

Gold foil nails look like they belong in a salon chair, but the technique itself is one of the most forgiving nail looks you can do at home. There is no steady hand drawing required, no stamping plate to line up, and no perfect symmetry to chase. The foil does most of the work. You place small, crinkled pieces of gold over a coloured base, seal them down, and the irregular edges that would ruin another design are exactly what make this one look expensive.
This guide walks through the regular-polish method, which is the easiest place to start. If you already use gel polish, the same placement ideas apply, and the gel notes in Step 5 and Step 7 explain where the process changes. Either way, take your time on the first hand. The second hand always goes faster.
How do you do gold foil nails at home?
To do gold foil nails at home, shape and buff your nails, apply a base coat and two thin coats of colour, then press small pieces of gold foil onto the still-tacky colour with tweezers or a silicone tool. Seal the foil with two thin top coats, clean up the edges, and finish with cuticle oil.
TL;DR
- Result: A soft nude or deep-colour manicure scattered with irregular gold foil flakes, finished glossy and smooth.
- Difficulty: Beginner-friendly. Foil placement is forgiving because uneven edges look intentional.
- Time: About 45 minutes for both hands, including drying time. Allow a little longer on your first attempt.
- Best base colours: Nude, blush, milky white, deep burgundy, forest green, navy, or black. Pale bases look soft and bridal; dark bases make the gold read bolder.
- The rule that matters most: Foil sticks to tacky polish, not to a fully dry surface and not to a wet, sliding one. Timing is the whole trick.
- Seal it twice: Two thin top coats keep foil edges flat and stop them catching on hair or fabric.
What gold foil actually is
Definition: gold foil vs. gold leaf. Nail foil, sometimes sold as gold leaf flakes for nails, is a very thin, crinkled metallic material made for decoration. It is not the same as edible gold leaf or the heavy gold leaf used in picture framing, and you should only use foil sold for nails or cosmetics on your nails. Nail foil usually comes as loose flakes in a small jar or as sheets you tear into pieces. Both work the same way; flakes are easier for a first attempt because you can pick up one small piece at a time.
Gold foil is different from gold glitter and from chrome powder, and the difference shows in the finished nail. Glitter is made of small, regular particles that sit on the surface and sparkle evenly. Chrome powder is buffed into a base to create a smooth, mirror-like sheet of colour. Foil tears into irregular shapes with crinkled folds, so it catches the light in broken, uneven flashes. That is why a foil manicure can look like cracked gold leaf on stone or like scattered confetti, depending on how much you use and where you put it. If you like the idea of a reflective gold finish but want something smoother and more uniform, our chrome tutorial is a useful comparison: How to Do Chrome Nails at Home.
Before you start: what you need
You do not need a professional kit. Most of this list is probably already in a drawer, and the only item you may need to buy is the foil itself, which is inexpensive and lasts for many manicures because you use so little per nail.
- Nail polish remover and cotton pads or lint-free wipes
- A nail file, a gentle buffer, and a cuticle pusher or orangewood stick
- Base coat
- A colour polish in your chosen shade
- Gold nail foil flakes (a small jar is plenty)
- Fine-tipped tweezers or a wax pencil, plus a silicone tool or the flat end of an orangewood stick for pressing
- A clear top coat with a good brush — a thicker, glossy top coat seals foil better than a very thin, fast-drying one
- A small brush or cotton bud dipped in remover for clean-up
- Cuticle oil
- A small dish or piece of foil to hold torn pieces while you work
Work somewhere with good light and a clear surface. Foil flakes are light, and a draught from an open window can send them across the table. If you are using gel polish, you will also need your usual gel base, colour, top coat, and lamp. Follow the instructions that came with your gel products for curing, and do not let uncured gel sit on your skin — wipe it away before curing.
Step 1: Shape, buff, and clean the nail
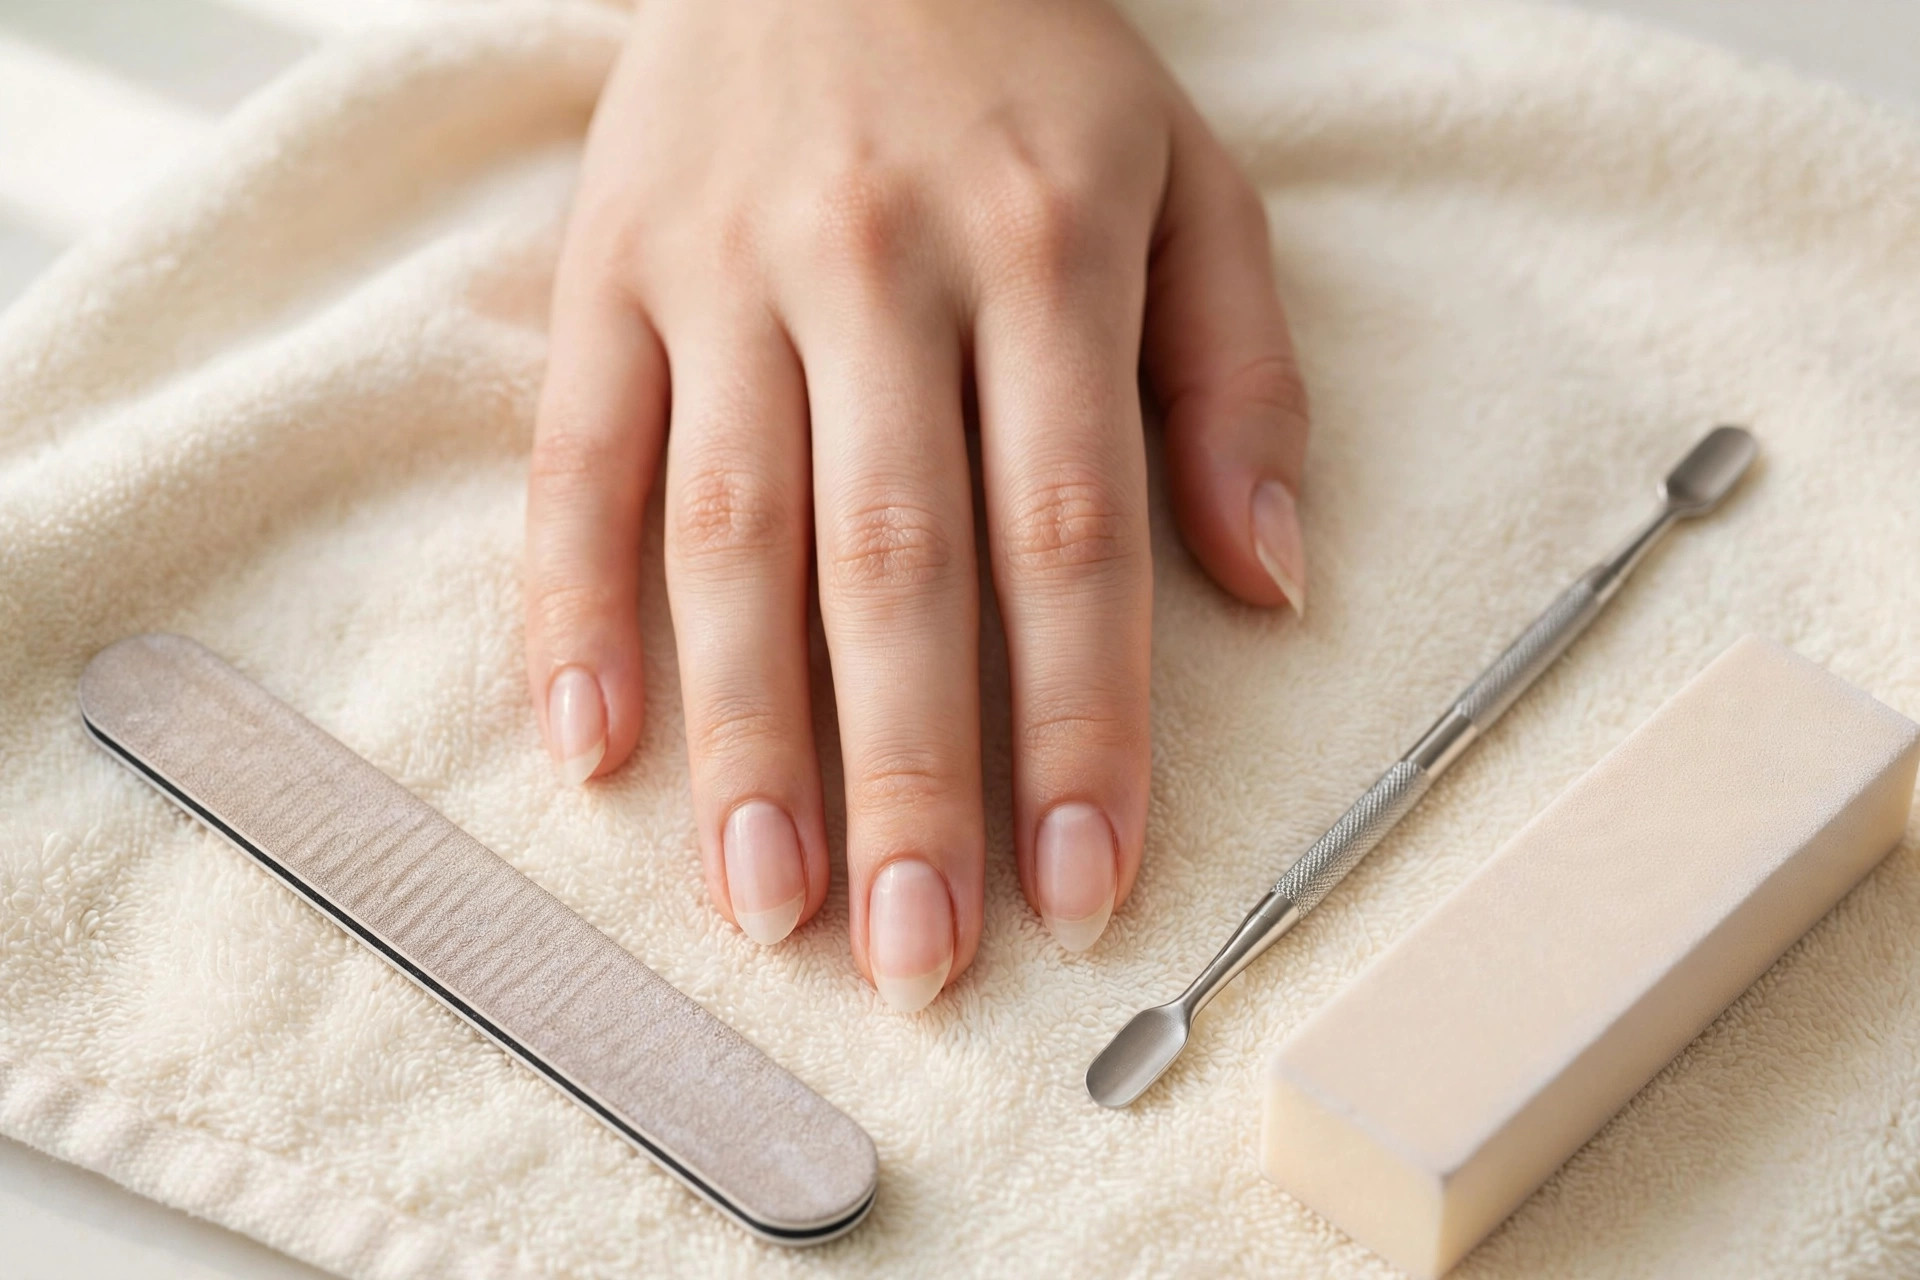
Remove any old polish and wash your hands. File your nails into the shape you want — a soft almond or rounded shape suits foil well because it keeps the focus on the gold rather than on sharp corners — and file in one direction rather than sawing back and forth, which can leave the free edge rough and more likely to split. Push the cuticles back gently with a cuticle pusher or orangewood stick. Do not cut cuticles at home unless you are confident doing so, and never force the pusher; the aim is a clean edge for polish to sit against, not a bare, sore rim.
Buff the nail plate very lightly, just enough to remove shine and give the base coat something to grip. This is not the step to be thorough about: heavy buffing thins the nail and makes polish peel sooner, not later. Wipe each nail with remover or a dehydrator wipe to remove dust and oil, and let the nails dry completely before you move on. Any oil left on the plate will show up later as polish lifting at the edges.
Step 2: Apply a base coat

Apply one thin coat of base coat to every nail, keeping the brush a hair’s breadth away from the cuticle and the side walls. A thin coat dries evenly and gives the colour something to hold on to; a thick coat pools at the edges and takes far longer to dry, which throws off the timing for the foil later.
Let the base coat dry fully. This is worth waiting for, even though it is tempting to rush. If the base is still soft when colour goes on, the layers can drag and wrinkle together, and you will have to start that nail again. While the base dries, tear or shake out a few foil pieces onto your dish so you are not fumbling with the jar later with wet nails.
Step 3: Apply two thin coats of colour

Apply your colour in two thin coats, not one thick one. Thin coats dry faster, look smoother, and give you a cleaner edge at the tip. Paint the first coat, let it dry until it is no longer wet to a light touch, then apply the second coat. The second coat is the one that matters for foil, so take care to keep it even and free of bubbles. Roll the bottle gently between your palms if the polish has been sitting; shaking it hard can whip air into the polish and leave tiny bubbles in the finish.
For a first foil manicure, a nude or blush shade is the kindest choice. It shows mistakes less, it suits almost every outfit, and the gold stands out without shouting. If you want a winter or evening version, a deep burgundy or forest green base turns the same foil into a completely different look — you can see how gold behaves on deeper seasonal shades in our winter gold ideas: Gold Nails Winter 2026 Trend.
Step 4: Pick up the foil
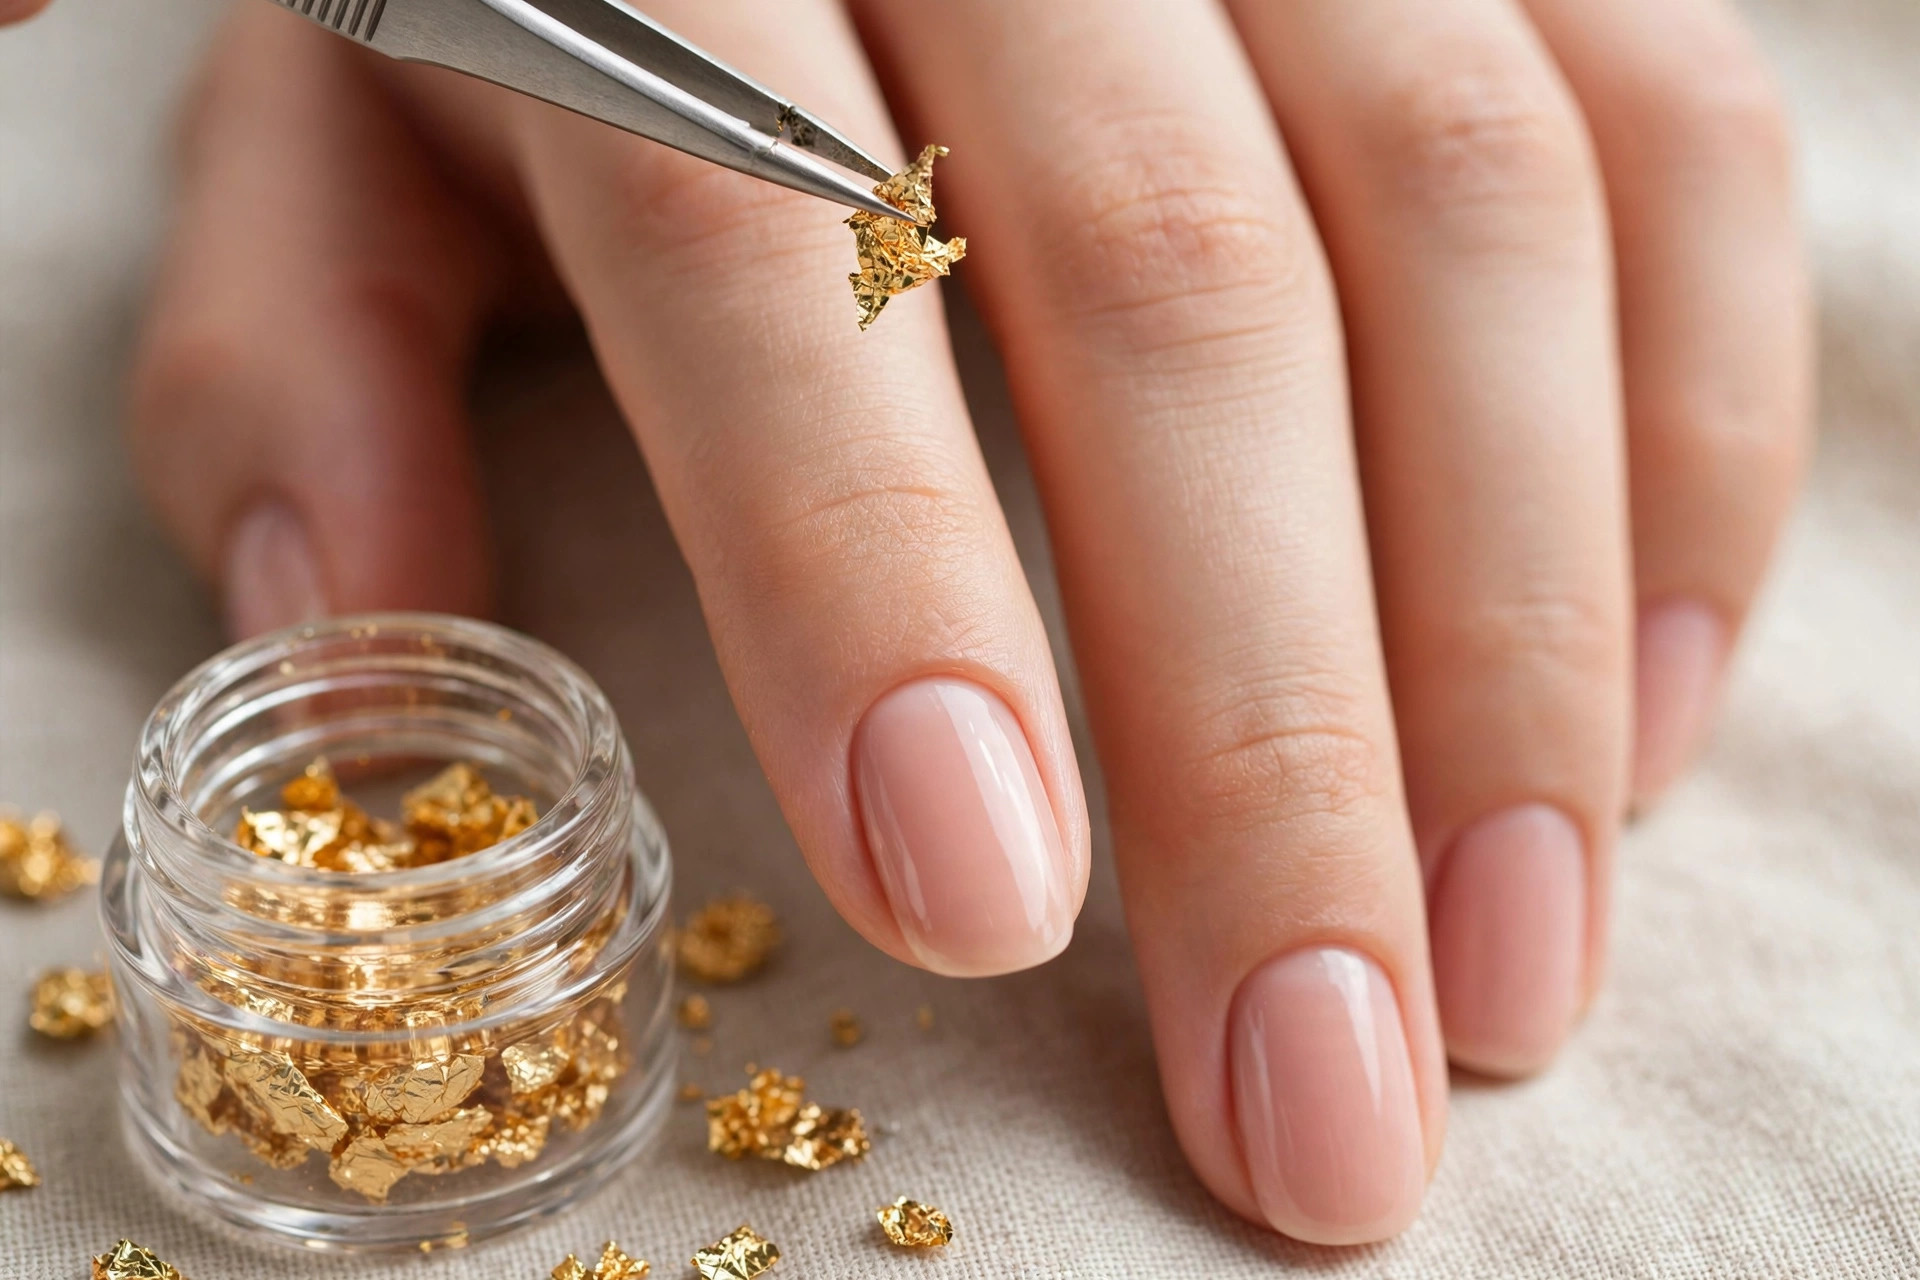
This is where the tackiness window comes in. After the second colour coat, wait until the polish is dry to a light touch but still slightly tacky when you press very gently — usually a few minutes, depending on your polish and the room temperature. If the surface is still wet and shiny, the foil will slide and smear. If it is completely dry and hard, the foil will not stick at all. When in doubt, test on one nail, usually the little finger, before committing to the whole hand.
Pick up one small piece of foil with fine tweezers or a wax pencil. Smaller pieces are easier to control than large ones, and you can always add a second piece next to the first. If you are using a foil sheet rather than flakes, tear off a small section and then tear that into two or three smaller pieces. Ragged edges are fine — in fact, they are the point. Avoid handling the foil with your fingertips if you can, because skin oils and moisture make the flakes stick to you instead of to the nail.
Step 5: Place and press the foil

Lay the foil piece onto the nail where you want it and press it down gently with a silicone tool or the flat end of an orangewood stick. Press from the centre outward so air does not get trapped underneath, and press the edges down in particular — a lifted foil edge is what catches later and peels the top coat away with it. Do not rub hard or drag the tool across the nail; pressing is enough, and rubbing can tear the foil or scuff the colour underneath.
Start with less foil than you think you need. Three to five small pieces per nail, placed near the cuticle, along one side, or scattered toward the tip, usually look more expensive than a nail covered edge to edge. Leave some of the base colour showing. The contrast between the flat colour and the broken gold is what gives the design its depth.
If you are working with gel polish, the timing changes here. Apply the foil to the cured colour coat while the inhibition layer is still tacky, or use a thin layer of foil gel or a tacky top coat made for foil, following your product’s instructions. Cure per your product’s instructions before moving on, and wipe away any uncured gel from the skin before curing.
Step 6: Repeat on every nail and check the balance

Work through one hand completely before starting the other, so you can judge the pattern while the method is still fresh in your mind. Vary the placement slightly from nail to nail — foil on the tips of two nails, near the cuticle on another, a single larger piece on a ring finger — but keep the amount roughly similar across the hand. If one nail ends up much heavier than the rest, it will draw the eye every time you look down.
Step back, literally, and look at both hands together in normal light before sealing. This is the last moment when a piece can be lifted off or an extra one added without disturbing a top coat. If a piece sits too close to the cuticle or over the side wall, nudge it inward with the silicone tool or lift it off with tweezers and replace it. Foil that hangs over the edge of the nail will peel within a day, no matter how good the top coat is.
Step 7: Seal with two thin top coats
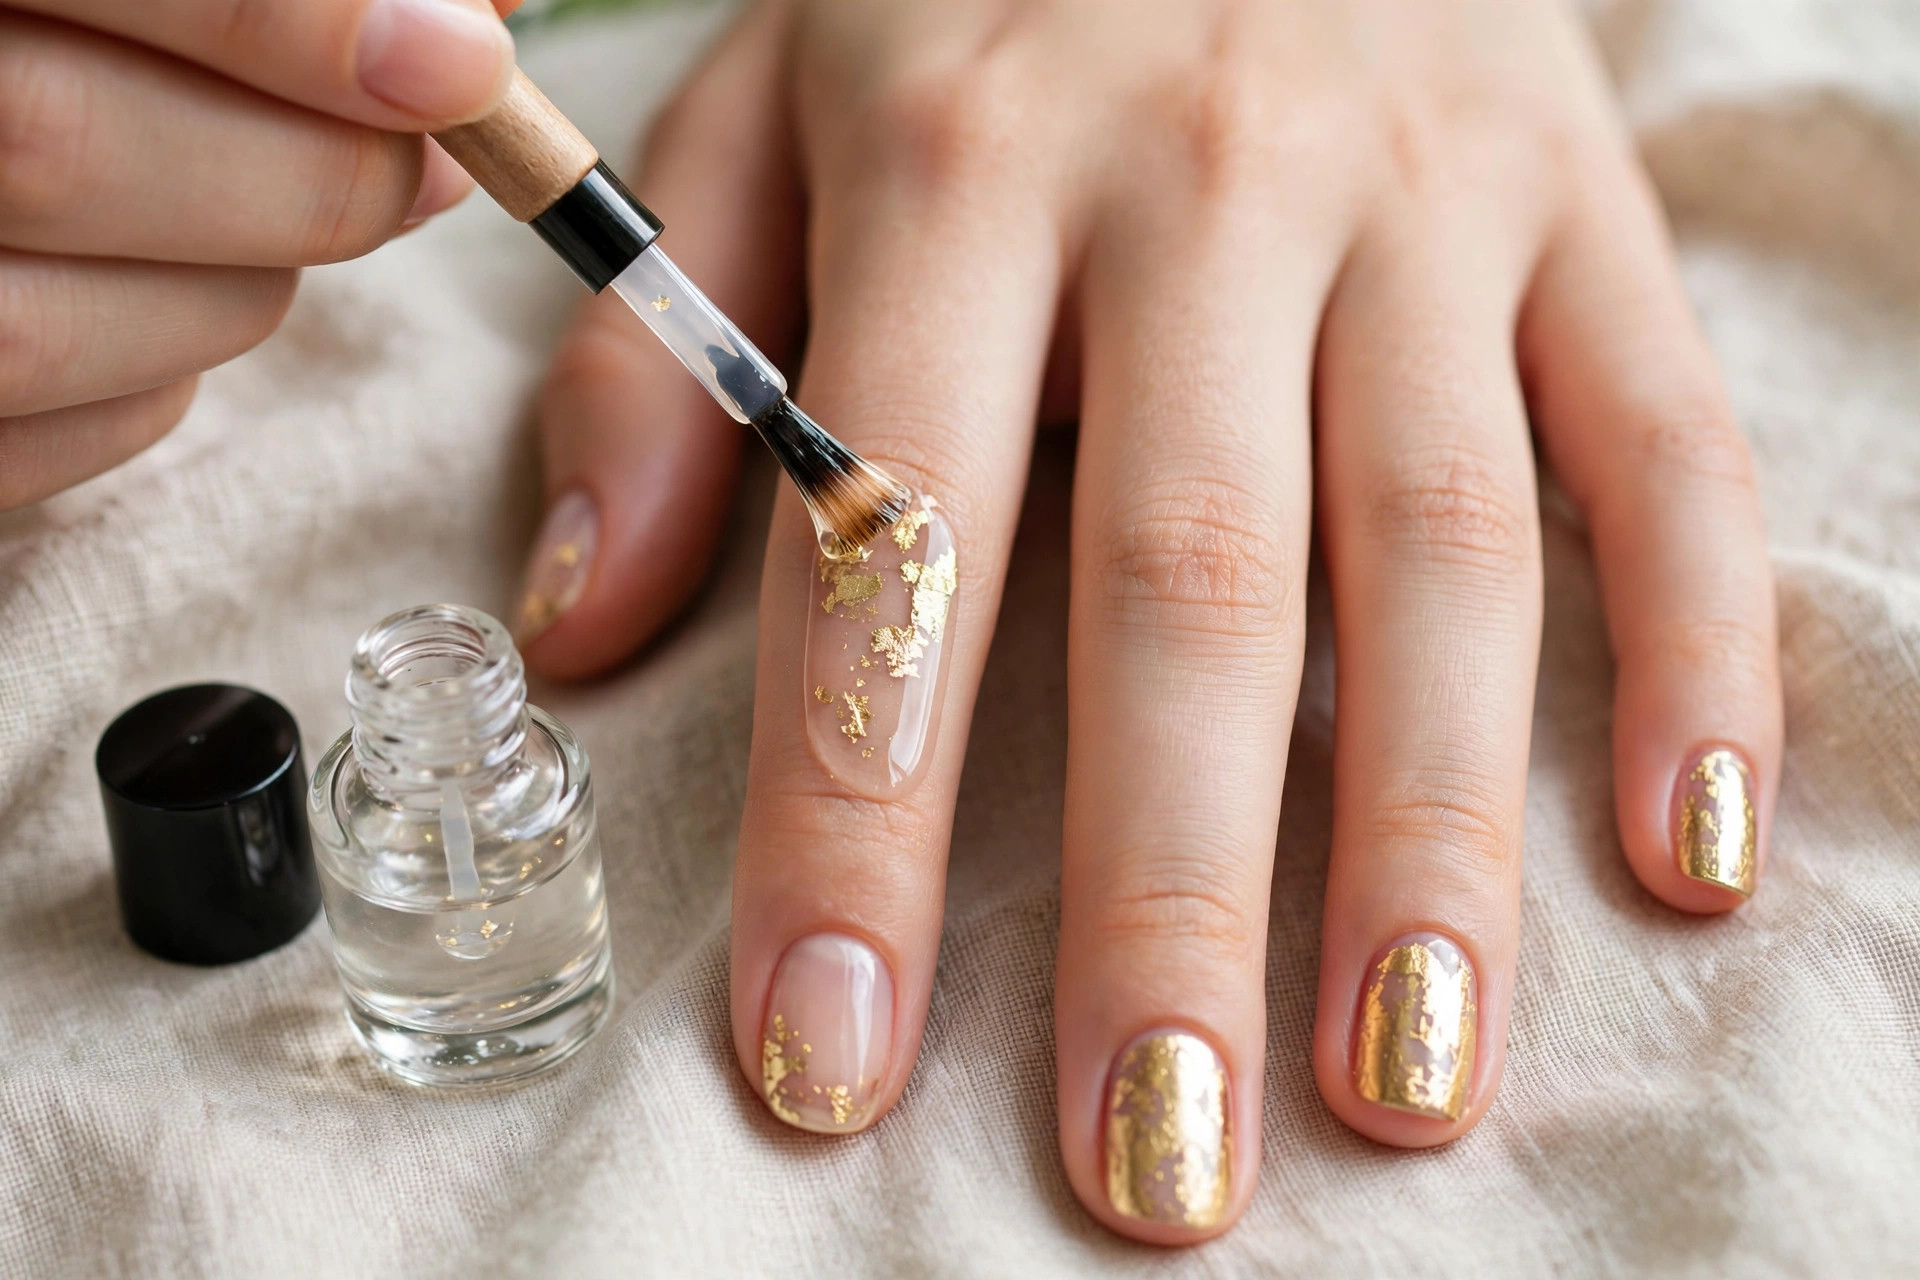
Sealing is not optional with foil. Unsealed flakes lift, snag, and dull quickly. Apply the first top coat thinly and gently, floating the brush over the foil rather than pressing down and dragging. Pressing can shift a piece that was only lightly stuck, and a dragged brush can pull a flake to one side and leave a streak of gold where you did not want it.
Let the first top coat dry, then apply a second thin coat, this time wrapping the very tip of the nail — running the brush lightly along the free edge — to lock the layers in at the point where wear starts. Two thin coats also fill the tiny ridges around each foil piece, which is what makes the finished nail feel smooth when you run a finger over it. If you can still feel a foil edge after the second coat, a third thin coat on that nail alone is better than one thick coat over the whole hand.
If you are using gel, apply your gel top coat over the foil and cure per your product’s instructions, then remove any tacky residue exactly as your product directs. Keep gel off the skin throughout, and wipe away any stray gel before curing.
Step 8: Clean up, oil, and admire the finished look
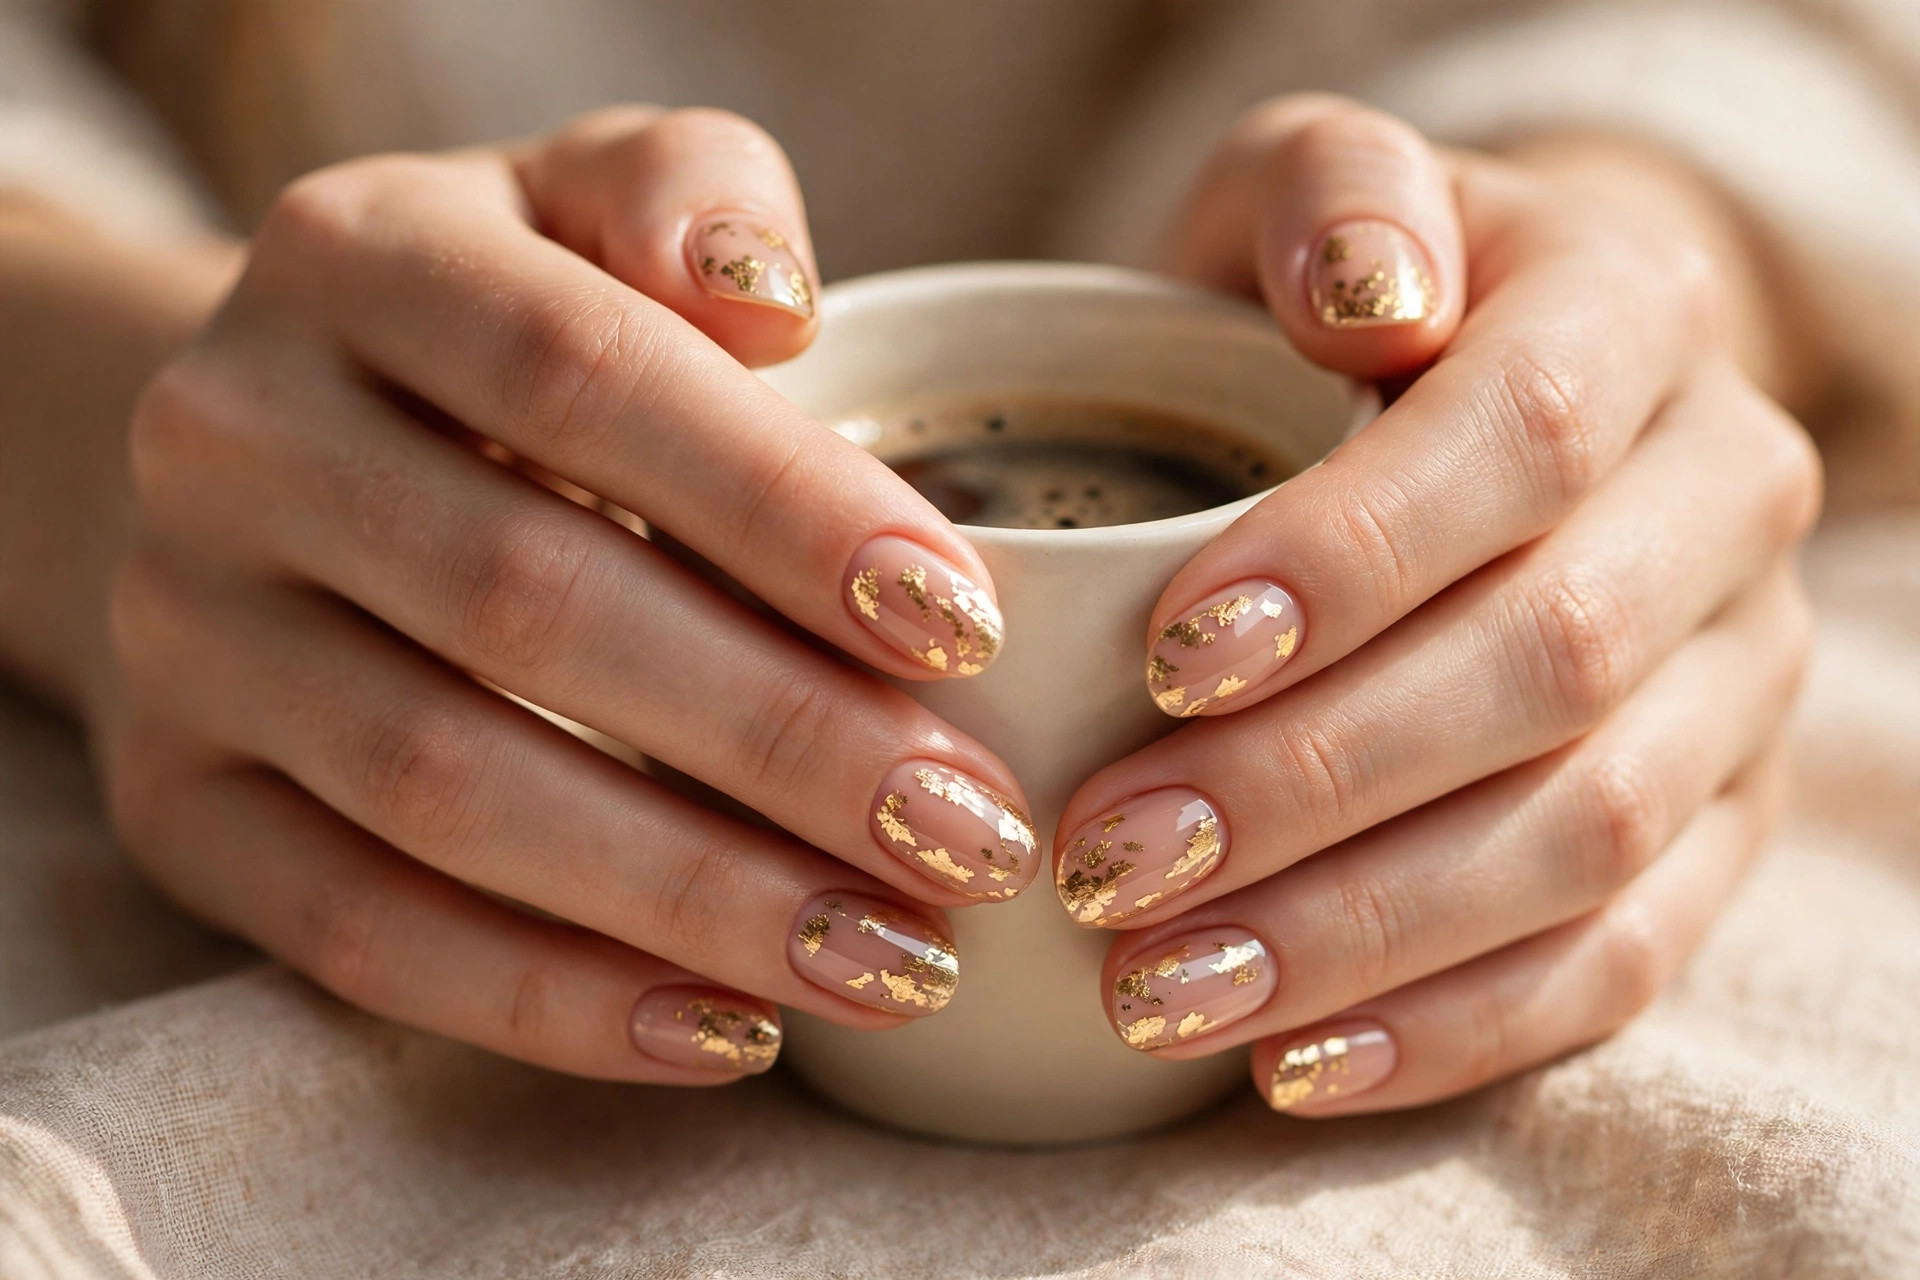
Once the top coat is fully dry, dip a small flat brush or a cotton bud in remover and tidy the skin around each nail, wiping away any polish that crept onto the cuticle or side walls. Do this with a light hand: scrubbing at the edge of a fresh manicure can lift the seal you just made. Finish with a drop of cuticle oil on each nail, massaged into the cuticle and the skin around it. Oil will not damage a fully dry top coat, and it makes the whole manicure look finished rather than merely painted.
Give the manicure a few more minutes before reaching for keys, bags, or tight sleeves. The surface may feel dry while the layers underneath are still setting, and pressure in that window leaves dents that no top coat can hide. Once it is set, foil nails are surprisingly hard-wearing for a decorative look, because the foil itself is sealed inside the polish rather than sitting on top of it.
Placement ideas to try next time
Once the basic method feels comfortable, placement is where you can make the look your own without learning a new skill. A foil French tip — flakes clustered only along the free edge — looks sharp on a milky or sheer base. A single statement nail, usually the ring finger, with heavier foil while the rest stay sparse, keeps the look wearable for work. A diagonal sweep of foil from one corner of the nail to the other suits longer nails and reads modern rather than bridal. And a full-coverage foil nail on just the thumbs, paired with scattered foil elsewhere, is an easy way to try a bolder version without committing every nail to it.
Colour pairings matter as much as placement. Gold foil on black or deep green looks dramatic and suits evening wear; on nude or blush it looks quiet and expensive; on white or milky pink it looks fresh and bridal. Rose gold or copper foil over the same bases gives a softer, warmer version of the same technique, and the method does not change at all.
Common mistakes and how to fix them
| Mistake | Why it happens | Fix |
|---|---|---|
| Foil will not stick | Colour coat fully dry, or base too smooth | Apply foil while the colour is still slightly tacky; if it has dried, add a very thin fresh coat of colour or a foil adhesive made for nails and try again |
| Foil slides and smears | Colour coat still wet | Wait longer before placing foil, and test tackiness on one nail first |
| Foil edges lift and catch | Edges not pressed down, or only one top coat | Press edges flat with a silicone tool before sealing, and always use two thin top coats |
| Foil looks patchy and dull | Pieces too large, or top coat dragged over them | Use smaller pieces, float the top coat brush, and let the first coat dry before the second |
| Polish peels at the tips within a day | Thick coats, or free edge not sealed | Use thin coats, cap the free edge with top coat, and avoid hot water for the first few hours |
| Foil on the skin or cuticle | Piece placed too close to the edge | Keep foil a hair’s breadth inside the nail edge, and remove stray pieces with tweezers before sealing |
| Bubbles in the colour | Polish shaken hard, or coats too thick | Roll the bottle gently, apply thin coats, and let each coat dry before the next |
Gold foil over regular polish vs. gel vs. press-ons
| Regular polish | Gel polish | Press-on nails | |
|---|---|---|---|
| Difficulty | Easiest; no lamp, no special products | Needs a lamp and gel products; follow manufacturer instructions | Easiest to apply, but foil must be sealed well to survive wear |
| Drying/curing | Air-dries; foil goes on tacky colour | Cure per your product’s instructions at each stage | Foil applied like regular polish, then sealed with top coat |
| How long it lasts | A few days to about a week with care | Usually the longest wear of the three | Depends on the adhesive; foil wear is rarely the weak point |
| Removal | Standard remover | Soak-off method for gel; never peel or force it off | Remove press-ons as directed, then remove polish normally |
| Best for | A first attempt, or a weekend look | A holiday or event where you want longer wear | Trying the look quickly, or a single occasion |
The honest summary is that regular polish is the best starting point for almost everyone. It costs the least, it needs no equipment, and if a nail goes wrong you can remove it and redo it in minutes. Gel is worth it when you want the look to last well beyond a week, and press-ons are worth it when you want the design without painting your own nails at all.
How long do gold foil nails last?
With regular polish, expect a few good days and often close to a week if you seal the free edge, wear gloves for washing up, and avoid using your nails as tools. Foil itself does not fade; what ends the manicure is usually tip wear or polish lifting at the edges, the same as any other manicure. With gel, the same design typically lasts longer, because the sealed gel layers resist chips better — but the exact wear depends on your nails, your products, and how hard you are on your hands, so treat any promise of a fixed number of days with suspicion.
Aftercare: keeping the gold bright
Foil nails need the same care as any manicure, with one extra point: once a foil edge lifts, it tends to catch and pull more foil with it, so deal with a lifted edge early rather than leaving it. If a small edge lifts, you can sometimes press it back down and add a thin top coat over that nail. If a larger section has come away, it is usually cleaner to remove that nail and redo it than to patch over a loose piece.
Wear gloves for cleaning and washing up, especially with hot water, which softens polish. Apply cuticle oil daily — it keeps the skin around the nail flexible and stops the cuticle area from drying out and pulling at the polish edge. Avoid picking at the foil or peeling polish off, which can take layers of the natural nail with it. If you notice redness, soreness, or irritation around a nail, remove the polish and let the nail rest; do not cover an irritated nail with more product.
Removal: how to take gold foil nails off
Removal is straightforward, and it is the same as removing any polish. Soak a cotton pad in remover, hold it on the nail for a short while to soften the top coats, then wipe away gently. Foil pieces may come away in flakes; that is normal. If polish remains, repeat with a fresh pad rather than scraping at the nail plate. For gel foil nails, use the soak-off method for your gel system and never peel gel off, since peeling can strip the top layers of the natural nail.
After removal, wash your hands, push cuticles back gently, and apply cuticle oil or hand cream. If you plan to redo foil nails straight away, give the nails a short break first — even a day without polish lets the nail plate recover moisture and makes the next manicure sit better.
Frequently asked questions
Can beginners do gold foil nails? Yes — foil is one of the most beginner-friendly nail looks because uneven, torn pieces look intentional rather than messy. Start with a nude base, small flakes, and a light hand, and let the foil do the decorative work for you.
Do you need special glue for gold foil nails? Not usually. Foil sticks to the tacky surface of a fresh colour coat, or to a foil adhesive if your polish has dried fully. Special glue is a useful backup to keep in the drawer, not a requirement for a first attempt.
Why does my gold foil keep peeling off? Usually because a foil edge was left lifted, only one top coat was used, or foil hung over the nail edge. Press edges flat before sealing, use two thin top coats, and keep every piece well inside the nail edge.
Can you use gold foil with gel polish? Yes. Place the foil on the tacky gel colour layer or a foil-specific product, cure per your product’s instructions, and seal with gel top coat. Keep uncured gel off the skin at all times and wipe away stray gel before curing.
How do you stop foil from looking messy? Use fewer, smaller pieces and leave base colour showing between them, so the gold reads as scattered decoration rather than a solid sheet. Step back and check both hands before sealing, and remove any piece that sits over the edge or too close to the cuticle.
What colours go best with gold foil? Nude, blush, and milky white keep the look soft and bridal; black, burgundy, forest green, and navy make the gold bolder and more dramatic. The same foil changes character completely with the base, so the base colour is really half the design.
A last word before you start
Gold foil rewards a relaxed hand. The first nail will probably look the least tidy and the fifth will look the best, and that is normal for any new technique. Keep the pieces small, keep the coats thin, seal twice, and let the irregular gold do what it does best — catch the light in a way no flat polish can. If you try it this weekend, start with the nude base in this guide. Once you trust the timing, the darker, bolder versions are waiting, and they use exactly the same steps.