

You can take gel polish off at home without wrecking your nails — it just takes acetone, foil, and patience. The method below is the same soak-off salons use: break the glossy seal, wrap each nail in acetone-soaked cotton, wait 10 to 15 minutes, and ease the softened gel off with a wooden stick. Done this way, your nails come out of a gel set looking exactly like they went in.
Here is the uncomfortable truth most removal guides skip: gel polish itself rarely damages nails. The damage happens during removal — peeling it off like a sticker, filing into the nail plate, or scraping at stubborn spots. Every step in this tutorial is designed to prevent exactly that, plus the four most common mistakes and what to do instead of each.
TL;DR
- Use the acetone foil soak-off: file the shiny top layer, protect skin with oil, wrap each nail in acetone-soaked cotton plus foil for 10–15 minutes.
- Never peel, pick, or force-scrape gel — lift only what slides off with a wooden stick; rewrap the rest for 5 more minutes.
- Expect 35–50 minutes total for both hands. Rushing is the number one cause of thin, weak nails after gel.
- Afterward: wash gently, massage in cuticle oil, buff lightly, and give nails a few gel-free days before your next set.
What is a gel soak-off?
A gel soak-off is the controlled removal of cured gel polish using acetone to break the bond between the polish and the nail. Cotton soaked in 100% acetone is held against each nail — usually under foil wraps — for 10 to 15 minutes until the gel softens and wrinkles, so it can be eased off without filing into the natural nail.
What you’ll need
Gather everything before you start — once your fingertips are wrapped in foil, you won’t want to go hunting for supplies. Work near a sink in a ventilated spot (open a window; acetone fumes are unpleasant in a closed room), keep acetone away from eyes and open flames, and if your skin is very sensitive, test one fingertip first — tingling or redness means stop and rinse.
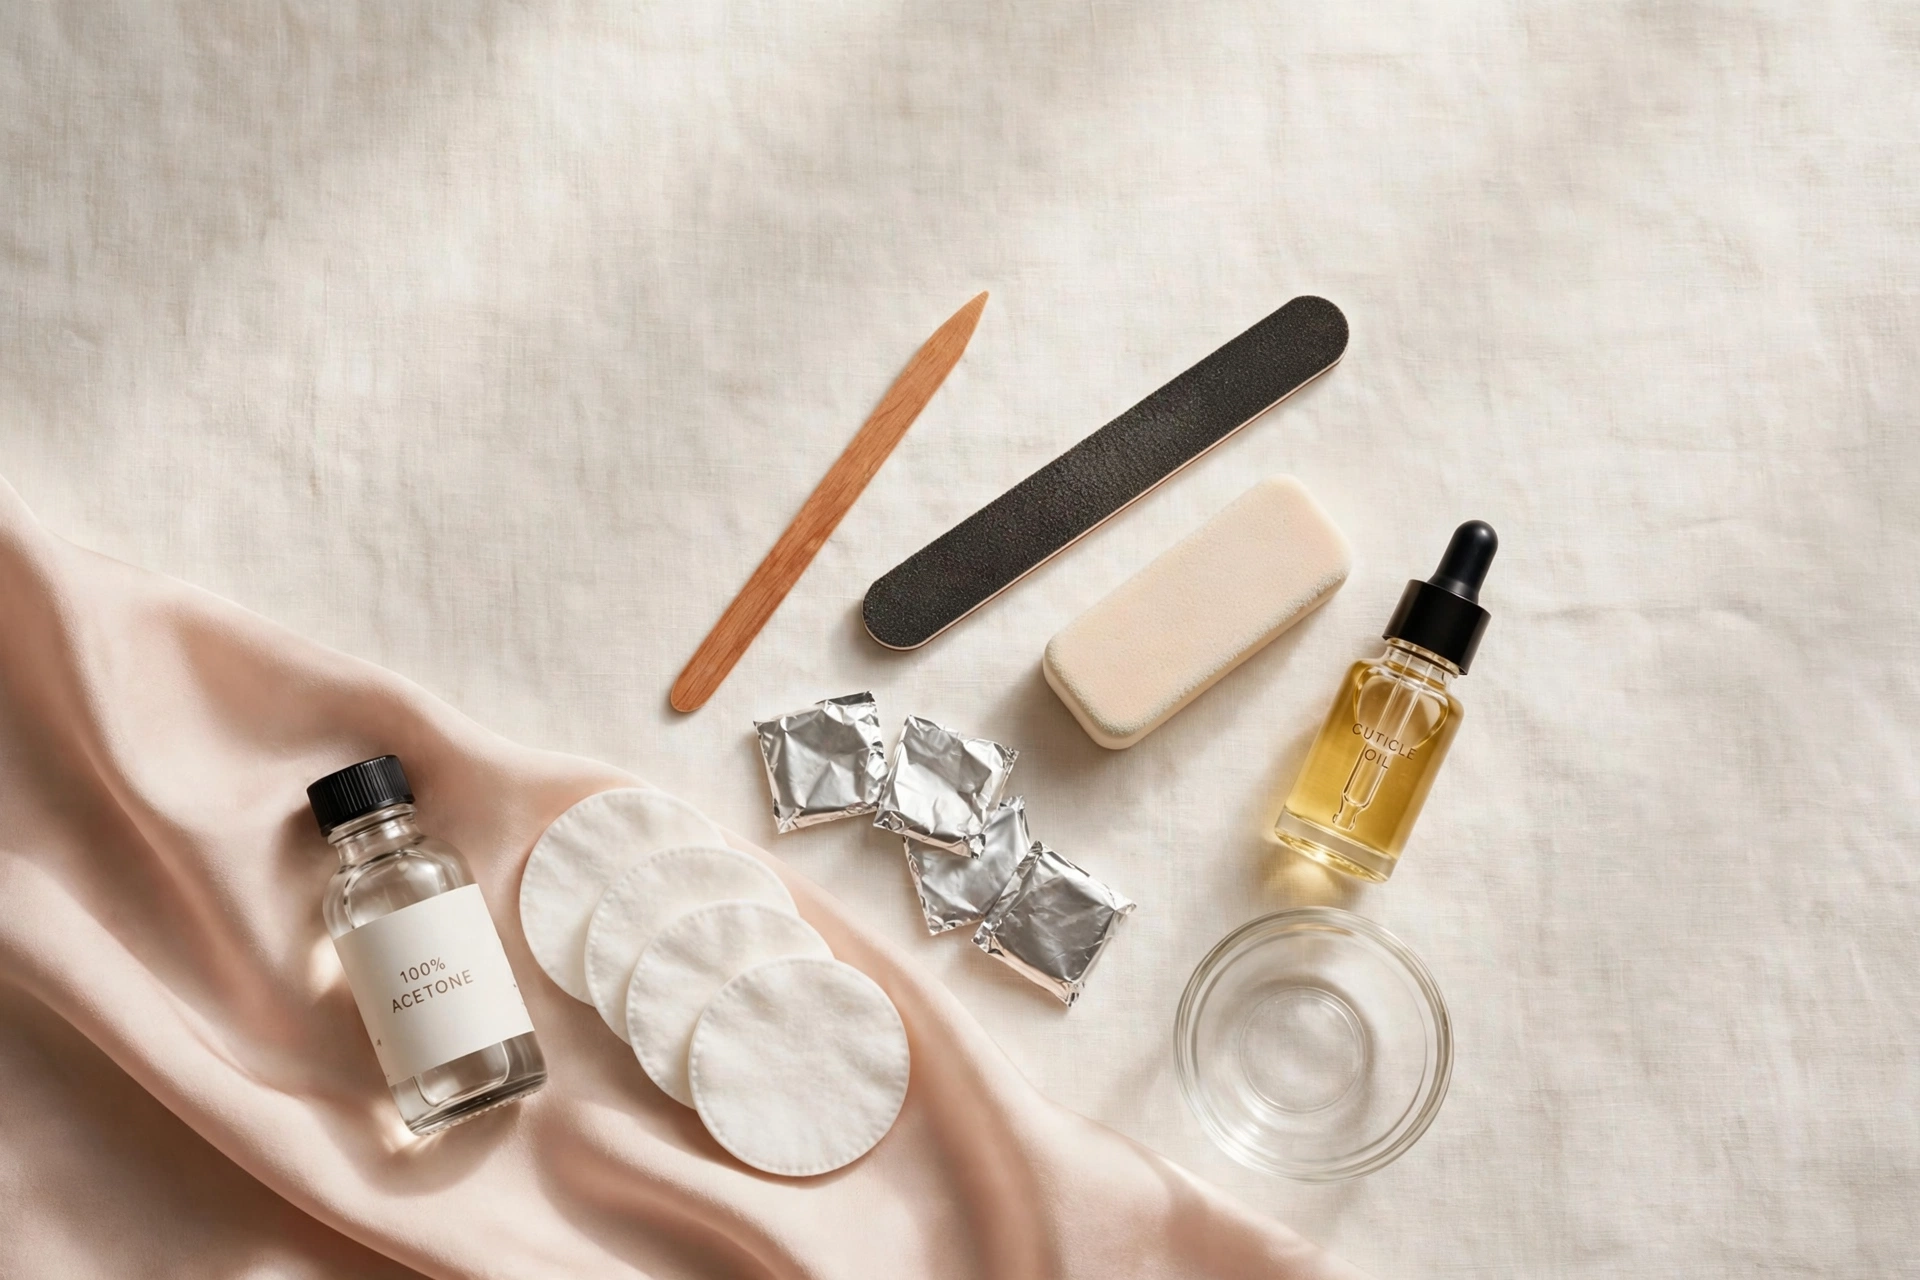
- 100% pure acetone — not regular nail polish remover, which is too weak for cured gel and will leave you scraping.
- Cotton pads, cut into nail-sized pieces — cotton balls work, but flat pads sit neater under foil.
- Aluminium foil, ten squares about 8×8 cm — ordinary kitchen foil is perfect.
- Nail file, around 180 grit — for the top coat only; anything coarser risks the natural nail.
- Wooden orangewood stick — cheap, gentle, and exactly the right softness. Skip metal pushers at home.
- Soft buffer block — the fine side only.
- Cuticle oil or petroleum jelly — protects skin from acetone and starts aftercare early.
- Small glass bowl — for the alternative soak method below.
- Hand lotion, a towel, and a timer — your phone timer is fine.
How difficult is this, and how long does it take?
Removing gel polish at home is genuinely beginner-friendly. There is no fiddly art, no curing, no steady hand required — what it demands is patience. Budget 35 to 50 minutes for both hands: about 10 minutes of setup, 10 to 15 minutes of soaking, and 10 to 15 minutes of gentle lifting, buffing, and aftercare. If you are rushing out the door, don’t start; the people who damage their nails are almost always the people who were in a hurry.
First-timers should do one hand at a time. Wrapping ten fingertips in foil is fiddly enough without racing the acetone on the other hand, and the second hand goes twice as fast once you’ve done the first.
How do you remove gel polish with the foil method?
Lightly file the glossy top coat to break the seal, protect the surrounding skin with cuticle oil, then wrap each nail in acetone-soaked cotton held by foil for 10 to 15 minutes. Ease the softened gel off with a wooden stick, buff lightly, and hydrate. The full process takes 35 to 50 minutes for both hands.
The foil isn’t decoration — it holds the acetone-soaked cotton tight against the nail and stops the acetone evaporating before it finishes working. Salons use this exact method because it’s the gentlest reliable way to dissolve the bond without touching the natural nail with anything abrasive.

- File the glossy top coat. Two or three gentle passes with a 180-grit file until the shine dulls on each nail. You’re breaking the seal so acetone can get in — not thinning anything. If you can see your natural nail through the gel, you’ve gone too far; stop and move on.
- Protect the skin around each nail. Massage cuticle oil or a thin layer of petroleum jelly into the cuticles and fingertips. Acetone is drying, and this barrier keeps your skin from feeling stripped afterward.
- Soak cotton, wrap in foil. Dampen a nail-sized piece of cotton with 100% acetone — saturated, not dripping — press it onto the nail, and wrap a foil square snugly around the fingertip. The foil holds the cotton in place and keeps the acetone from evaporating. Do one hand at a time if wrapping feels clumsy.
- Wait 10 to 15 minutes. Set a real timer and leave the wraps alone. The gel needs this time to soften and wrinkle at the edges. Peeking early just lets acetone evaporate — it adds minutes, it doesn’t save them.
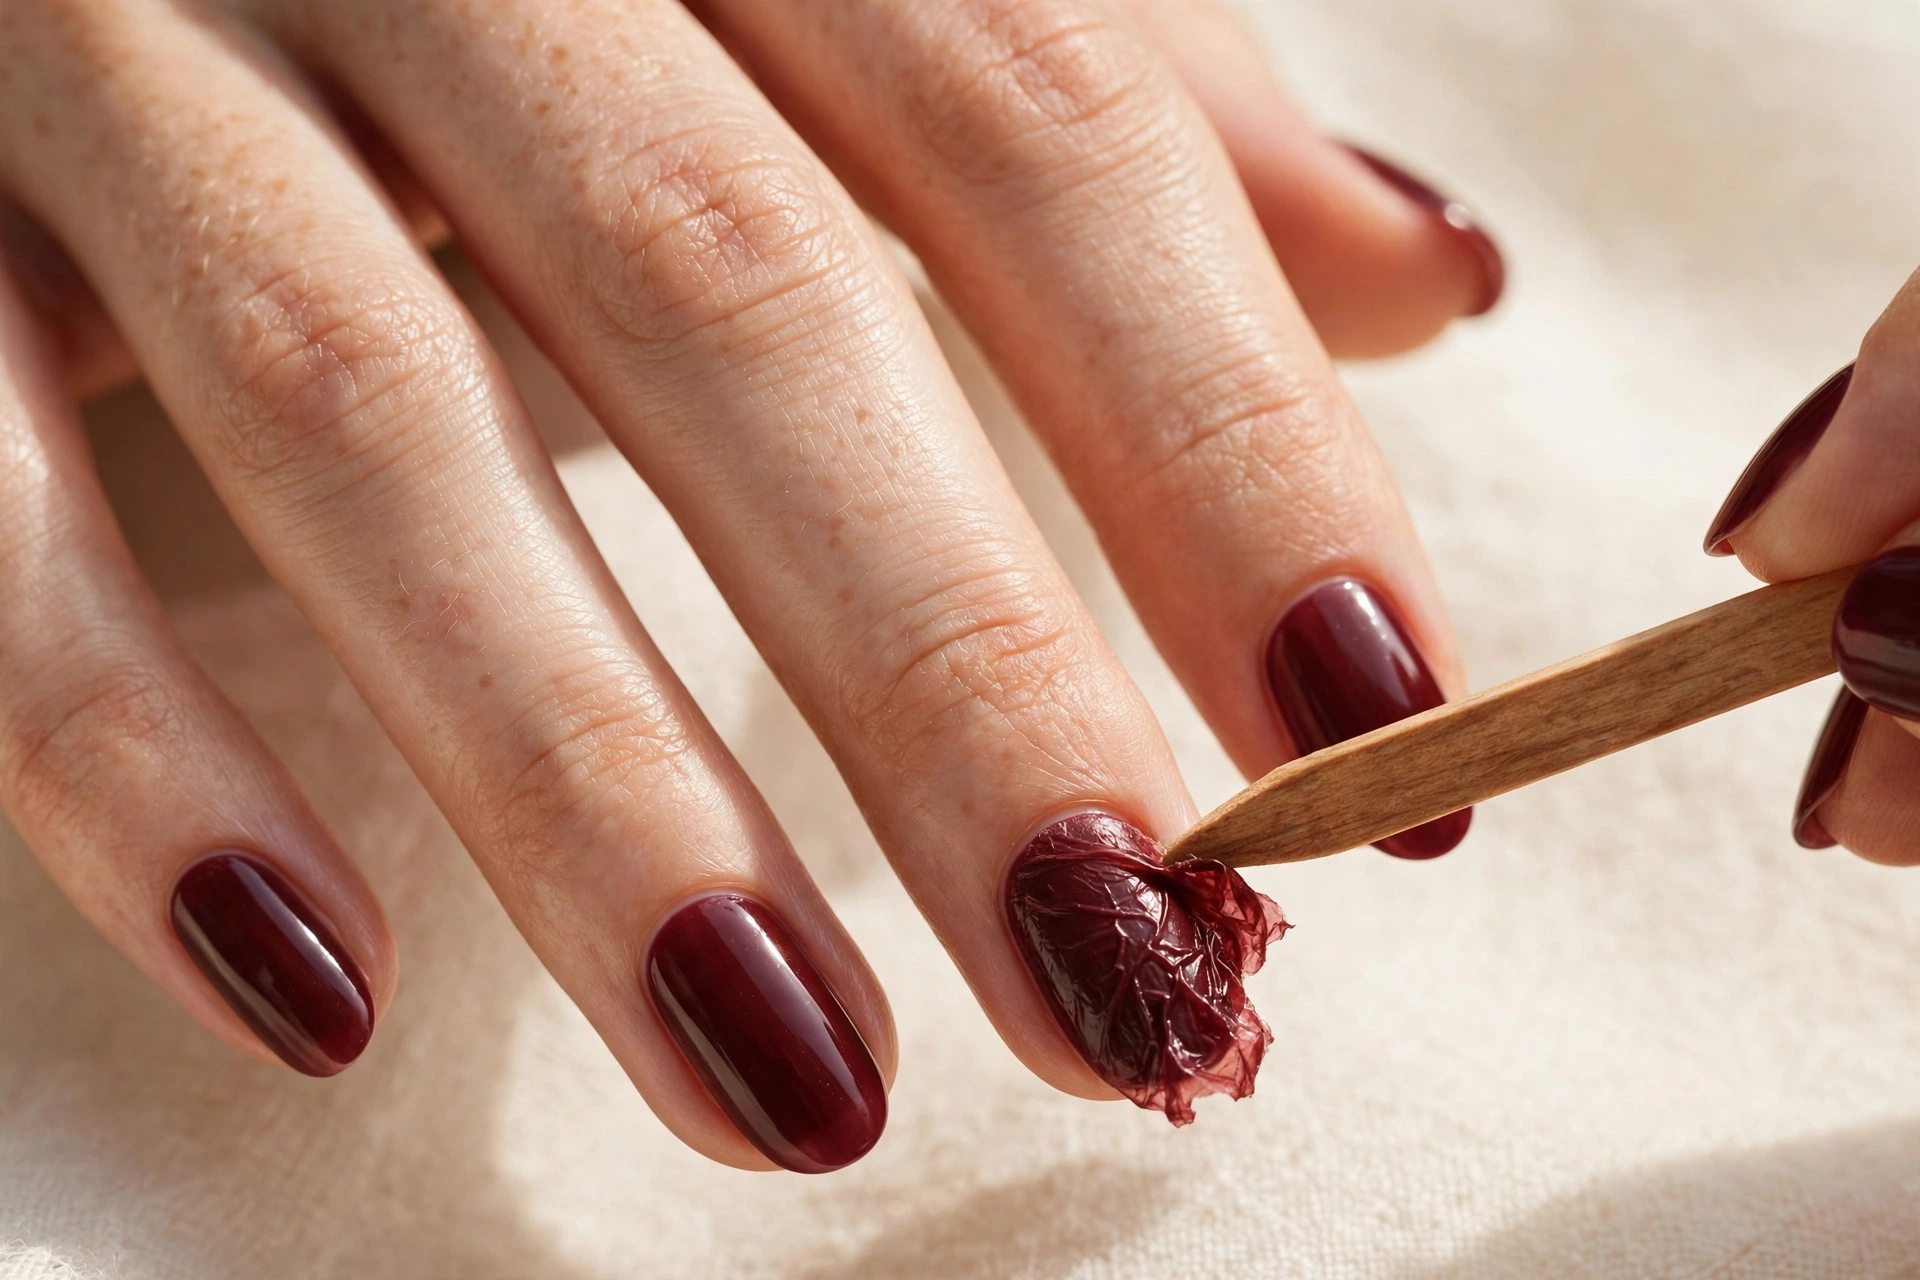
- Check one nail, then push — gently. Unwrap your pinky first; it’s the least visible if it needs more time. Slide the flat end of the orangewood stick under a lifted edge and ease the softened gel toward the free edge. Anything that doesn’t slide off with light pressure isn’t ready — rewrap that nail and give it 5 more minutes.
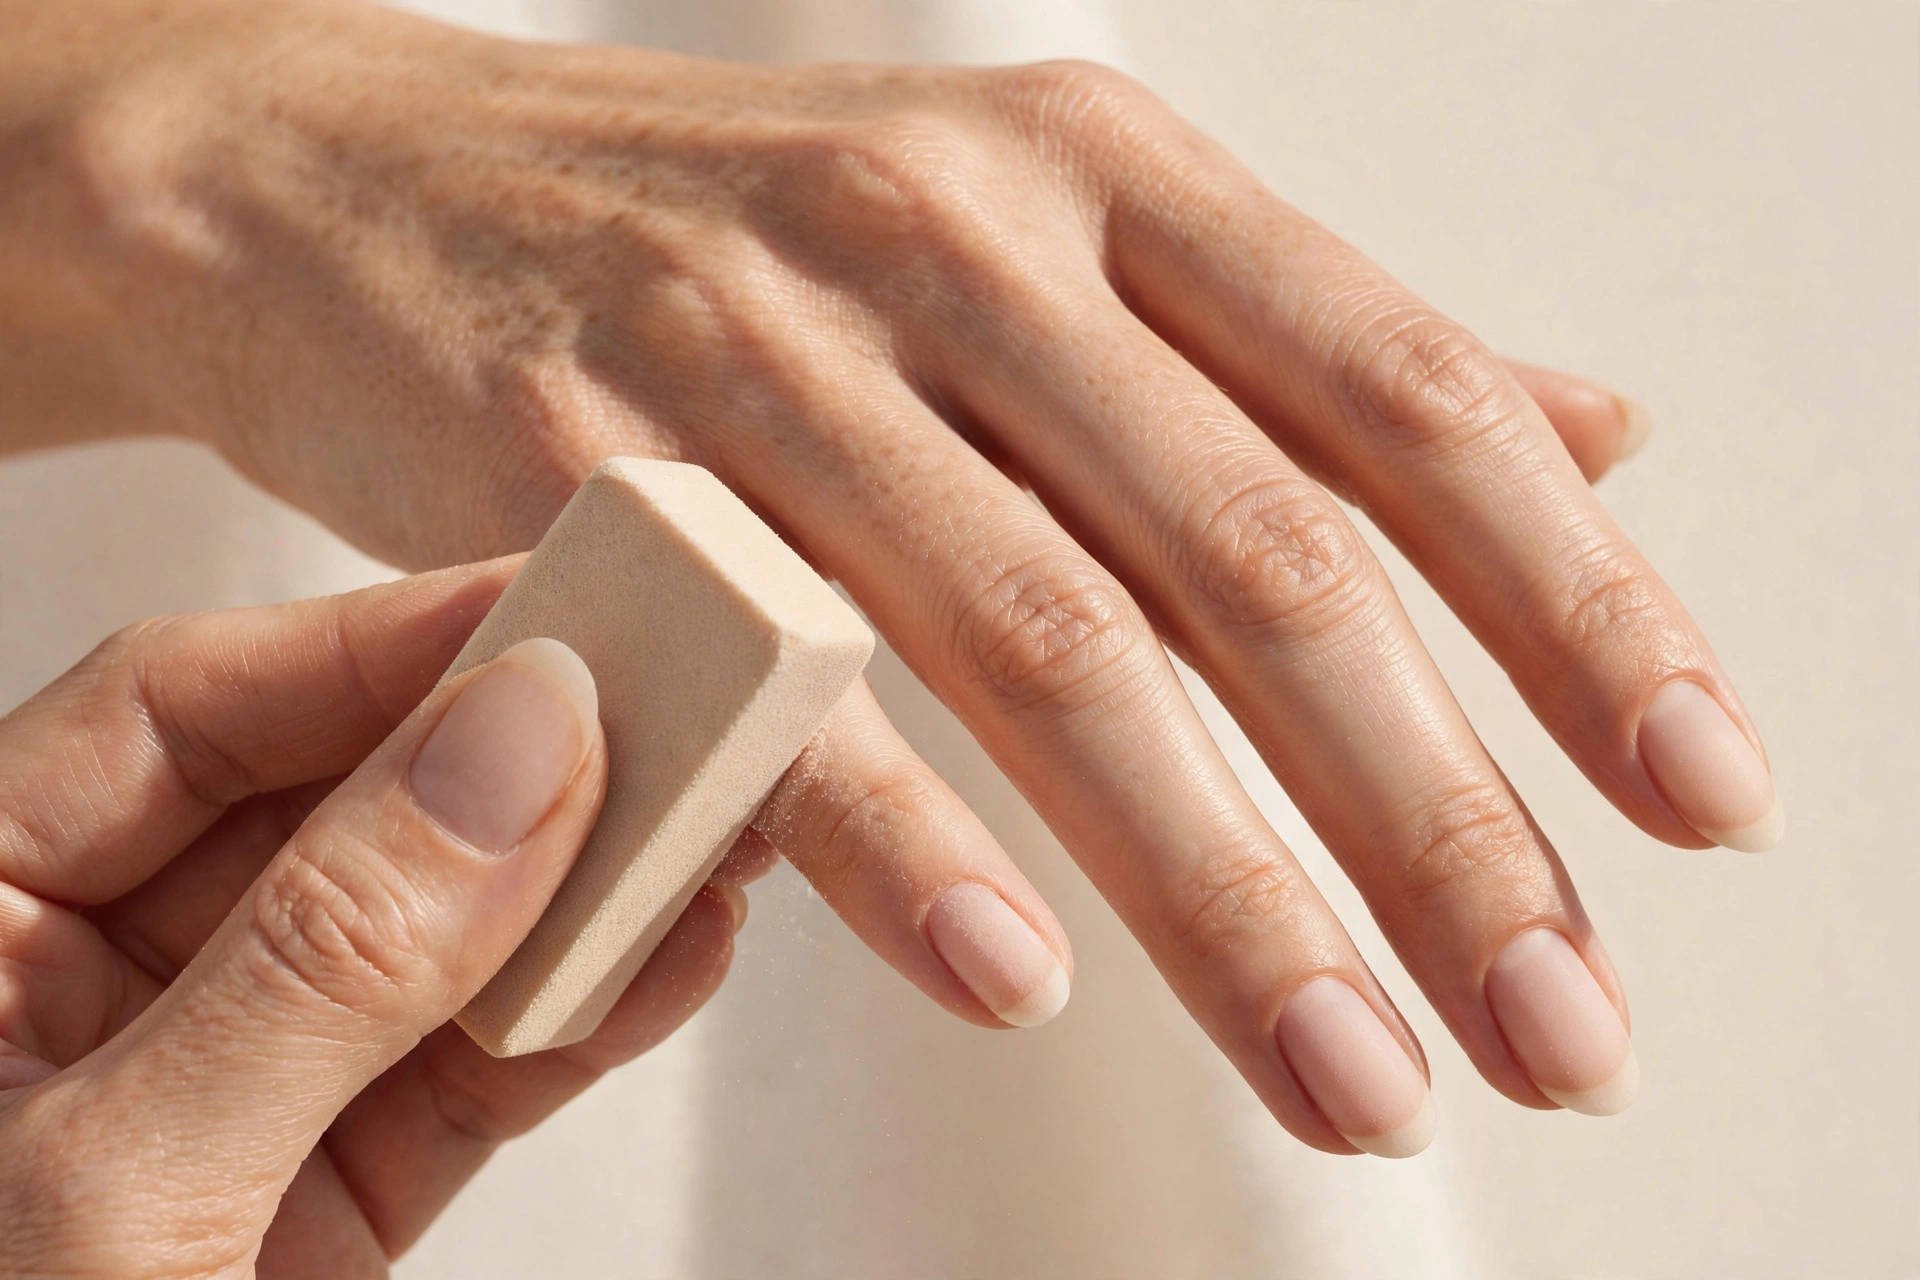
- Buff lightly and reshape. Once the gel is off, smooth any faint residue with two or three feather-light passes of the buffer block — no pressure, no scrubbing. Then file your nails into shape; if you’re deciding between shapes, our guide to round, oval, and squoval nail shapes walks through which flatter different hands.
- Wash, oil, moisturize. Rinse with lukewarm water and a gentle soap, pat dry, then massage cuticle oil into every nail and its surrounding skin. Finish with hand cream. Your nails have been sealed under an occlusive layer for weeks — this hydration step is what keeps them flexible instead of brittle.

How long does it take to soak off gel polish?
Plan on 10 to 15 minutes of wrapped soaking per hand, plus 10 to 15 minutes of setup and finishing — 35 to 50 minutes total for both hands. Thicker or older sets may need a second short soak on stubborn nails. Anything promising a five-minute removal is either peeling (which damages the nail) or wishful thinking.
What if the gel won’t budge after 15 minutes?
Rewrap the stubborn nails with fresh acetone-soaked cotton and give them another 5 to 10 minutes. Older sets, darker colors, and thicker builder-gel layers sometimes need a second soak — that’s normal, not a failure. What you must not do is escalate to force: scraping, digging, or filing harder will take natural nail with the gel. If two full soaks still leave patches, try the bowl-soak fallback in the next section rather than reaching for anything sharp or powered.

Is there a gentler alternative to foil wraps?
Yes — if your gel was applied over a peel-off base coat, warm soapy water is the gentlest option there is. Soak your fingertips in a bowl of warm (not hot) water with a drop of dish soap for 10 to 15 minutes, then ease the edges up with a wooden stick; the gel should release in soft sheets. This only works when a peel-off base was used at application — it’s a property of the base coat, not a trick you can apply to standard gel.
Without a peel-off base, the standard fallback is the plain bowl soak: pour enough 100% acetone into a small glass dish to cover your nails, oil the surrounding skin generously first, and soak your fingertips for 10 minutes with a warm towel draped over your hand to slow evaporation. It’s effective, but it’s harsher on skin than foil wraps because more skin sits in the acetone — foil remains the kinder default.
Which gel removal method is least damaging?
Not every removal method treats your nails equally. Here’s how the common options compare for at-home use:
| Method | Damage risk | Time | Skill needed |
|---|---|---|---|
| Acetone foil soak-off | Low, when done gently | 35–50 min | Beginner |
| Peel-off base + warm water | Very low | 10–15 min | Beginner (needs peel-off base at application) |
| Acetone bowl soak | Low for nails, harsher on skin | 25–35 min | Beginner |
| E-file / nail drill | Moderate to high at home | 10–20 min | Professional — not recommended DIY |
The pattern is simple: chemical softening (acetone, water) is forgiving; mechanical removal (filing, drilling, peeling) is where nails get hurt. Choose the slowest method you’re willing to do properly — it’s the one your nails will thank you for.
What are the most common gel removal mistakes?
Ask anyone with thin, bendy nails after gel and one of these four is usually the culprit. The good news: each has a simple fix.
Mistake 1: Peeling the gel off like a sticker
Gel bonds to the top keratin layers of your nail, so peeling it lifts those layers right off with it. That’s the thin, white, flaky surface people describe after a bad removal — it isn’t the gel’s fault, it’s the peeling. The fix: soak until the gel slides, not until you’re impatient. If an edge is already lifting, file it smooth so it doesn’t catch, then soak that nail off properly.
Mistake 2: Over-filing the nail surface
The natural nail plate is only about half a millimeter thick, and aggressive filing removes keratin that takes weeks to grow back. The fix is a stroke count, not a feeling: two or three gentle passes with a 180-grit file to dull the shine, then hands off. You are breaking the top coat’s seal, not sanding anything down.
Mistake 3: Skipping cuticle oil
Acetone strips oils from skin and nails alike. Without protection, cuticles dry out, hangnails appear, and nails feel straw-like for days. The fix is oil twice: a thin barrier of oil or petroleum jelly around the nails before wrapping, and a generous massage of cuticle oil into every nail after washing. Keep it up daily for a few days — it’s the cheapest nail insurance there is.
Mistake 4: Rushing the soak
Checking at minute six, declaring it “not working,” and switching to scraping is the classic self-sabotage. Gel softens on its own schedule, and every early peek lets acetone evaporate and resets the clock. The fix: set a real timer for 10 to 15 minutes, walk away, and rewrap stubborn nails for 5 more minutes instead of forcing them. Patience is the entire technique.
How do I care for my nails after gel removal?
Treat your nails like recovering skin: hydrate daily, keep them short for a week, and give them a few gel-free days before the next set. Massage cuticle oil into each nail morning and night, use a plain hand cream after washing your hands, and file — never bite — any snags.
A keratin or nail-hardener treatment can help for a week or two if nails feel soft — use it as directed on the packaging and stop if nails start feeling brittle instead of stronger. More coats are not better, and this is cosmetic care, not a medical treatment. If you want length while your natural nails rest, a well-applied set of press-ons is the kindest bridge — see how to make press-on nails last so they don’t pop off in a day.

Keep nails on the shorter side while they recover — short nails look intentional and elegant, and our elegant short nail designs prove the point. Most people find their nails feel normal again within a few days of hydration and rest, ready for whatever’s next — a fresh gel set, chrome nails at home, or a shade chosen to actually suit you (here’s how to adapt nail trends to your personal style).
Why do my nails feel thin after gel removal?
In most cases, it’s the removal that thinned them, not the gel. Peeling gel lifts the top keratin layers with it, and over-filing sands them away — both leave nails measurably thinner. Nails kept under gel for weeks can also feel oddly soft and bendy at first; that’s normal and firms up within days of hydration and rest, provided the surface wasn’t scraped.
If your nails feel thin after every set no matter how gently you remove, look honestly at the removal step before blaming the polish — the four mistakes above cover nearly every case. Nails grow out fully in three to six months, so even a rough patch is temporary with kind handling going forward.
When should you stop and see a professional?
Most gel removal is uneventful, but stop what you’re doing and get professional advice if you notice any of the following — these are signs something beyond normal wear is going on, and they’re not things to treat or diagnose yourself:
- Gel lifting with soreness or tenderness in the nail underneath.
- Greenish, yellowish, or dark discoloration on the nail plate.
- Persistent redness, swelling, or itching around the cuticle that doesn’t settle.
- Nails that stay painfully thin, split repeatedly, or won’t grow despite gentle care.
A nail technician can assess application-related issues; anything involving pain, skin changes, or discoloration deserves a clinician’s eyes. When in doubt, leave the remaining gel alone and book the appointment.
Gel removal questions, answered
Can I remove gel polish without acetone?
Only in one specific case: if the gel was applied over a peel-off base coat, soaking in warm soapy water will release it. Standard gel polish is cured to resist water and regular remover, so 100% acetone is the standard solvent. Non-acetone removers will leave you scraping — exactly the habit that thins nails.
Will removing gel polish damage my nails?
Not when it’s done patiently. Soak-off removal — acetone wrap, gentle push with a wooden stick, light buffing — doesn’t meaningfully thin the nail plate. The horror stories come from peeling, forceful scraping, and over-filing. Done right, nails leave a gel set in the same condition they entered it.
How often can I remove and reapply gel polish?
There is no fixed rule, and many people wear back-to-back sets for months with gentle removal and no issues. The honest signal is your own nails: if they feel thin, bendy, or peel easily, take a gel-free week or two with daily cuticle oil before reapplying.
Can I peel off gel polish if it’s already lifting?
Resist it — a lifting edge is the riskiest moment to peel. The loose section will take a layer of natural nail with it, leaving a thin, weak spot. File the lifted edge smooth so it doesn’t catch on anything, then soak that nail off properly with the foil method.
Should I use a nail drill to remove gel at home?
Not unless you’re trained. E-files remove gel quickly in skilled hands, but one slip digs into the natural nail, and at home there’s no professional watching your pressure. The acetone soak-off takes longer but forgives every mistake a drill punishes. Leave the e-file to the salon.
Do I need to file my nails before soaking off gel?
Yes — lightly. The glossy top coat is designed to seal everything out, including acetone, so two or three gentle passes with a 180-grit file to dull the shine make a real difference. You’re breaking the seal, not thinning the nail. Skip this step and your soak can take twice as long.