
TL;DR — 20 Negative Space Nail Designs for Winter
- The idea: paint your design over a bare nail instead of a full-color base. The unpolished nail becomes part of the look — and the reason it grows out so gracefully.
- Best shapes: almond, oval and squoval flatter negative space most; short rounds work beautifully for dots and hearts.
- Winter palette: espresso, burgundy, emerald, navy and terracotta, with champagne gold for line work.
- Difficulty: most of the 20 ideas below are beginner-friendly, because the bare sections forgive small wobbles a full-color base would show.
- The payoff: regrowth is nearly invisible, so the manicure still looks intentional at week three.
If you want a winter manicure that looks expensive, grows out without an obvious line, and doesn’t demand salon-level artistry, negative space is the design family to learn this season. Instead of covering the whole nail, you leave part of it bare and let the natural nail do half the talking. The result reads modern and intentional — more gallery than glitter — and it pairs with everything from an office blazer to a holiday dress. Below are twenty distinct ideas, each with the shape, colors, difficulty and reasoning so you can pick the right one instead of scrolling past forty look-alikes.
What are negative space nails?
Negative space nails are manicures that deliberately leave sections of the natural nail unpolished, making the bare nail itself part of the design. Rather than treating the nail as a canvas to be covered edge to edge, the artist (or you, at home) paints around a shape — a half-moon at the cuticle, a window along one side, the interior of a crescent — and seals everything, bare sections included, under top coat. The contrast between polish and untouched nail is what gives the style its clean, architectural feel.
Which nail shape suits negative space designs best?
Almond, oval and squoval shapes suit negative space designs best, because their curved edges create more interesting geometry for bare sections to sit against than a blunt square. That said, short round nails are the sweet spot for dots, hearts and micro-French tips, while long coffin nails carry large mosaic and V-cut patterns. Length matters too: anything medium or longer gives a design room to read, but half of the ideas below were chosen specifically because they work on short nails.
The table gives a quick scan of difficulty and time for a representative set of the designs. Times assume regular polish at home; gel or a salon visit adds curing and appointment time but the technique ranking stays the same.
| Design | Best shape | Difficulty | Time (at home) |
|---|---|---|---|
| Classic half-moon | Almond, oval | Easy | 30 min |
| Gold cuticle outline | Squoval, oval | Easy | 20 min |
| Matte black triangles | Almond | Easy | 25 min |
| Diagonal color block | Squoval | Easy–Medium | 35 min |
| Terracotta chevrons | Oval | Medium | 45 min |
| Dot constellations | Short round | Easy | 20 min |
| Bare-center snowflake | Short round | Medium | 50 min |
| Diamond mosaic | Long coffin | Medium–Hard | 60 min |
| V-cut French | Almond | 40 min | |
| Marble veins | Oval | Medium | 45 min |
The 20 negative space nail designs
Every design below is photographed on a real hand at the shape and length described, so what you see is what the geometry actually looks like worn — not a swatch or a render.
1. The Classic Half-Moon
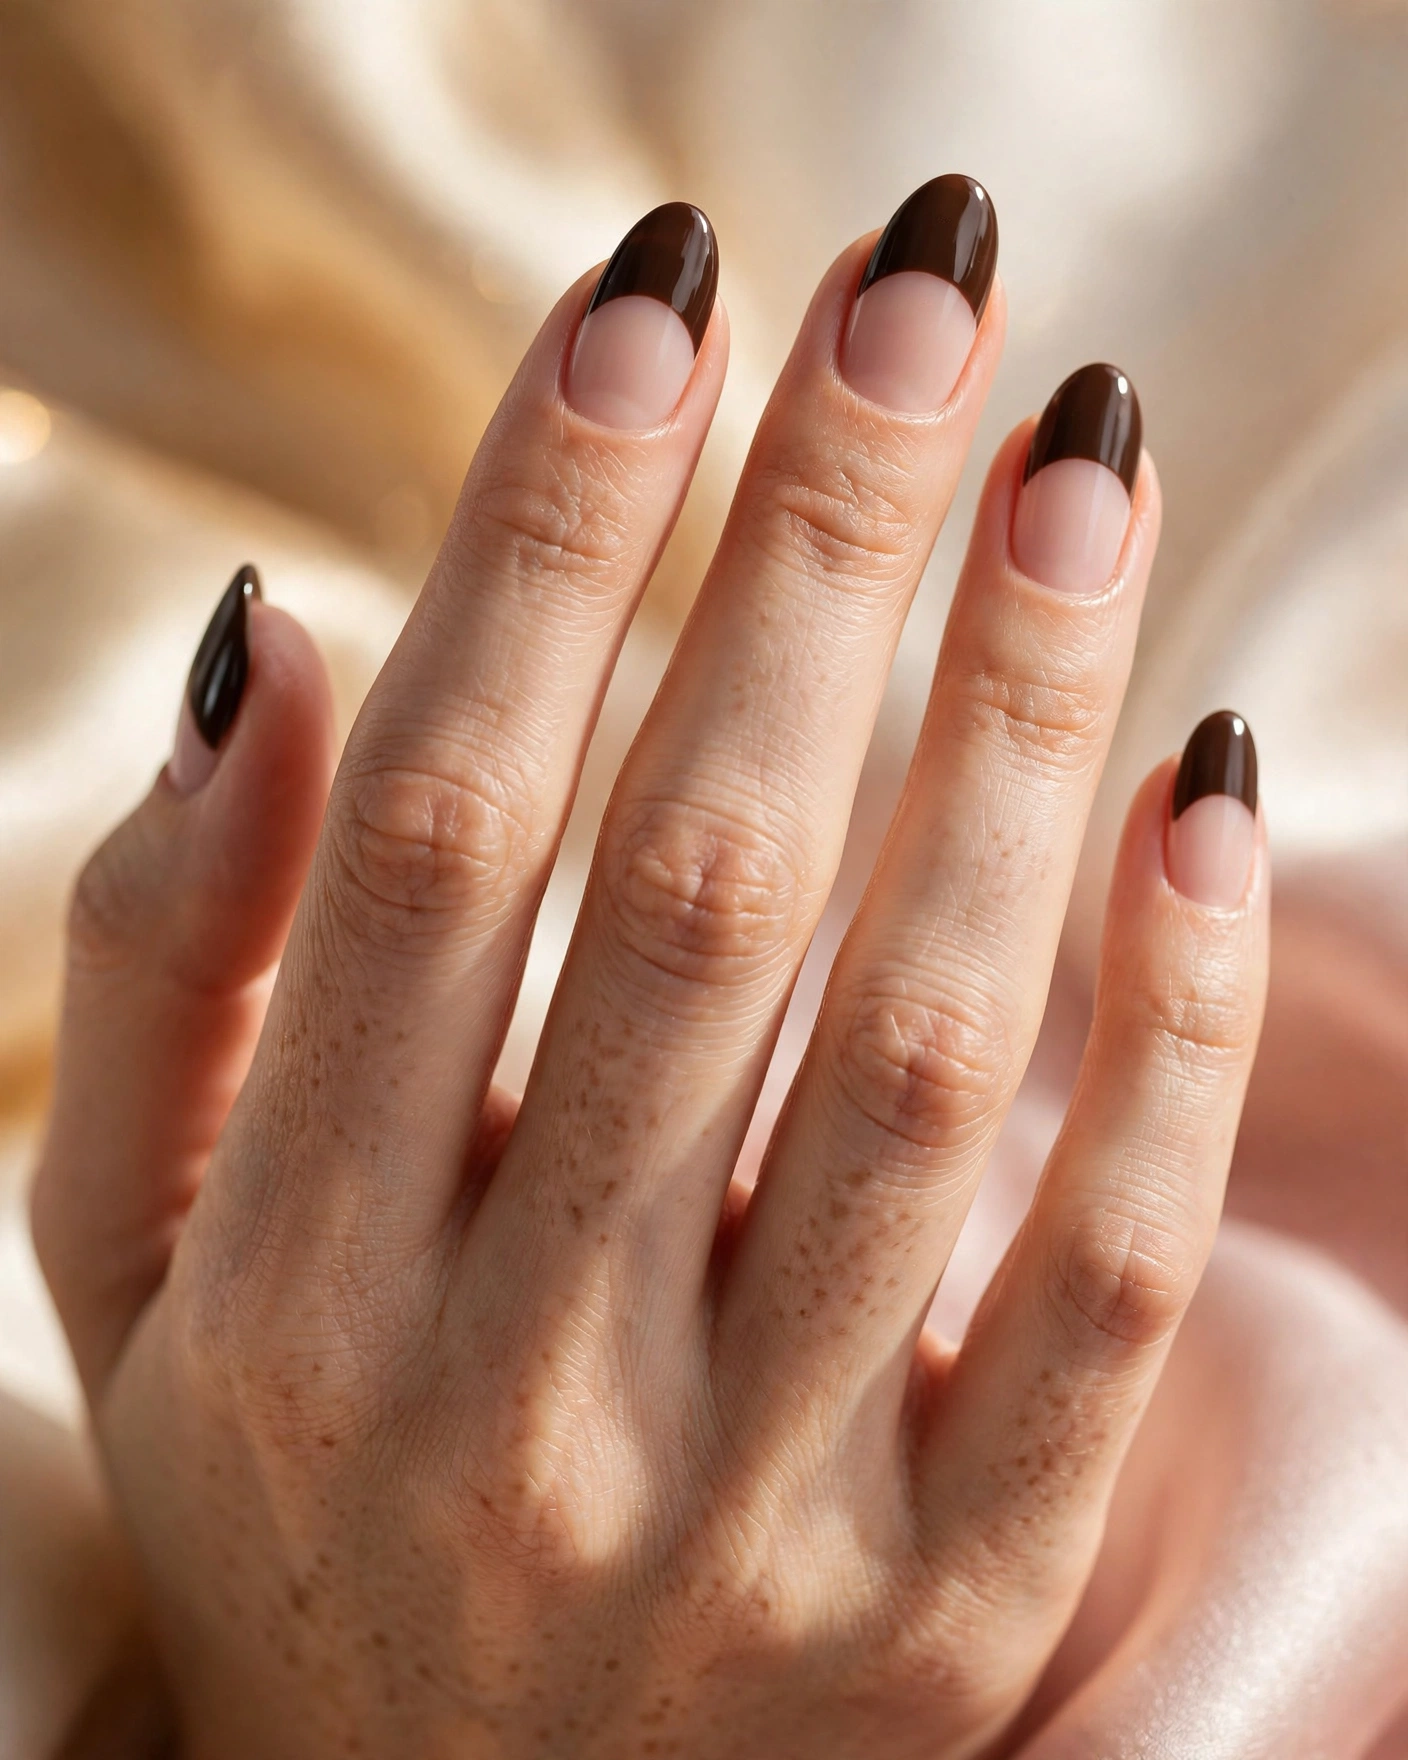
The look: a clean crescent of bare nail at each cuticle, with deep color covering the rest — the oldest trick in the negative-space book, and still the most flattering.
Shape and length: medium almond or oval; the curve of the shape echoes the curve of the crescent.
Colors and finish: espresso brown, glossy. Black or oxblood work the same way.
Difficulty: easy — a reinforcement-ring sticker gives you a perfect arc in seconds.
Why choose it: this is the lowest-risk entry point. Regrowth starts at the cuticle, exactly where the bare section already is, so the manicure looks deliberate for weeks. It also suits conservative offices, which full-on nail art often doesn’t.
2. The Gold-Traced Cuticle
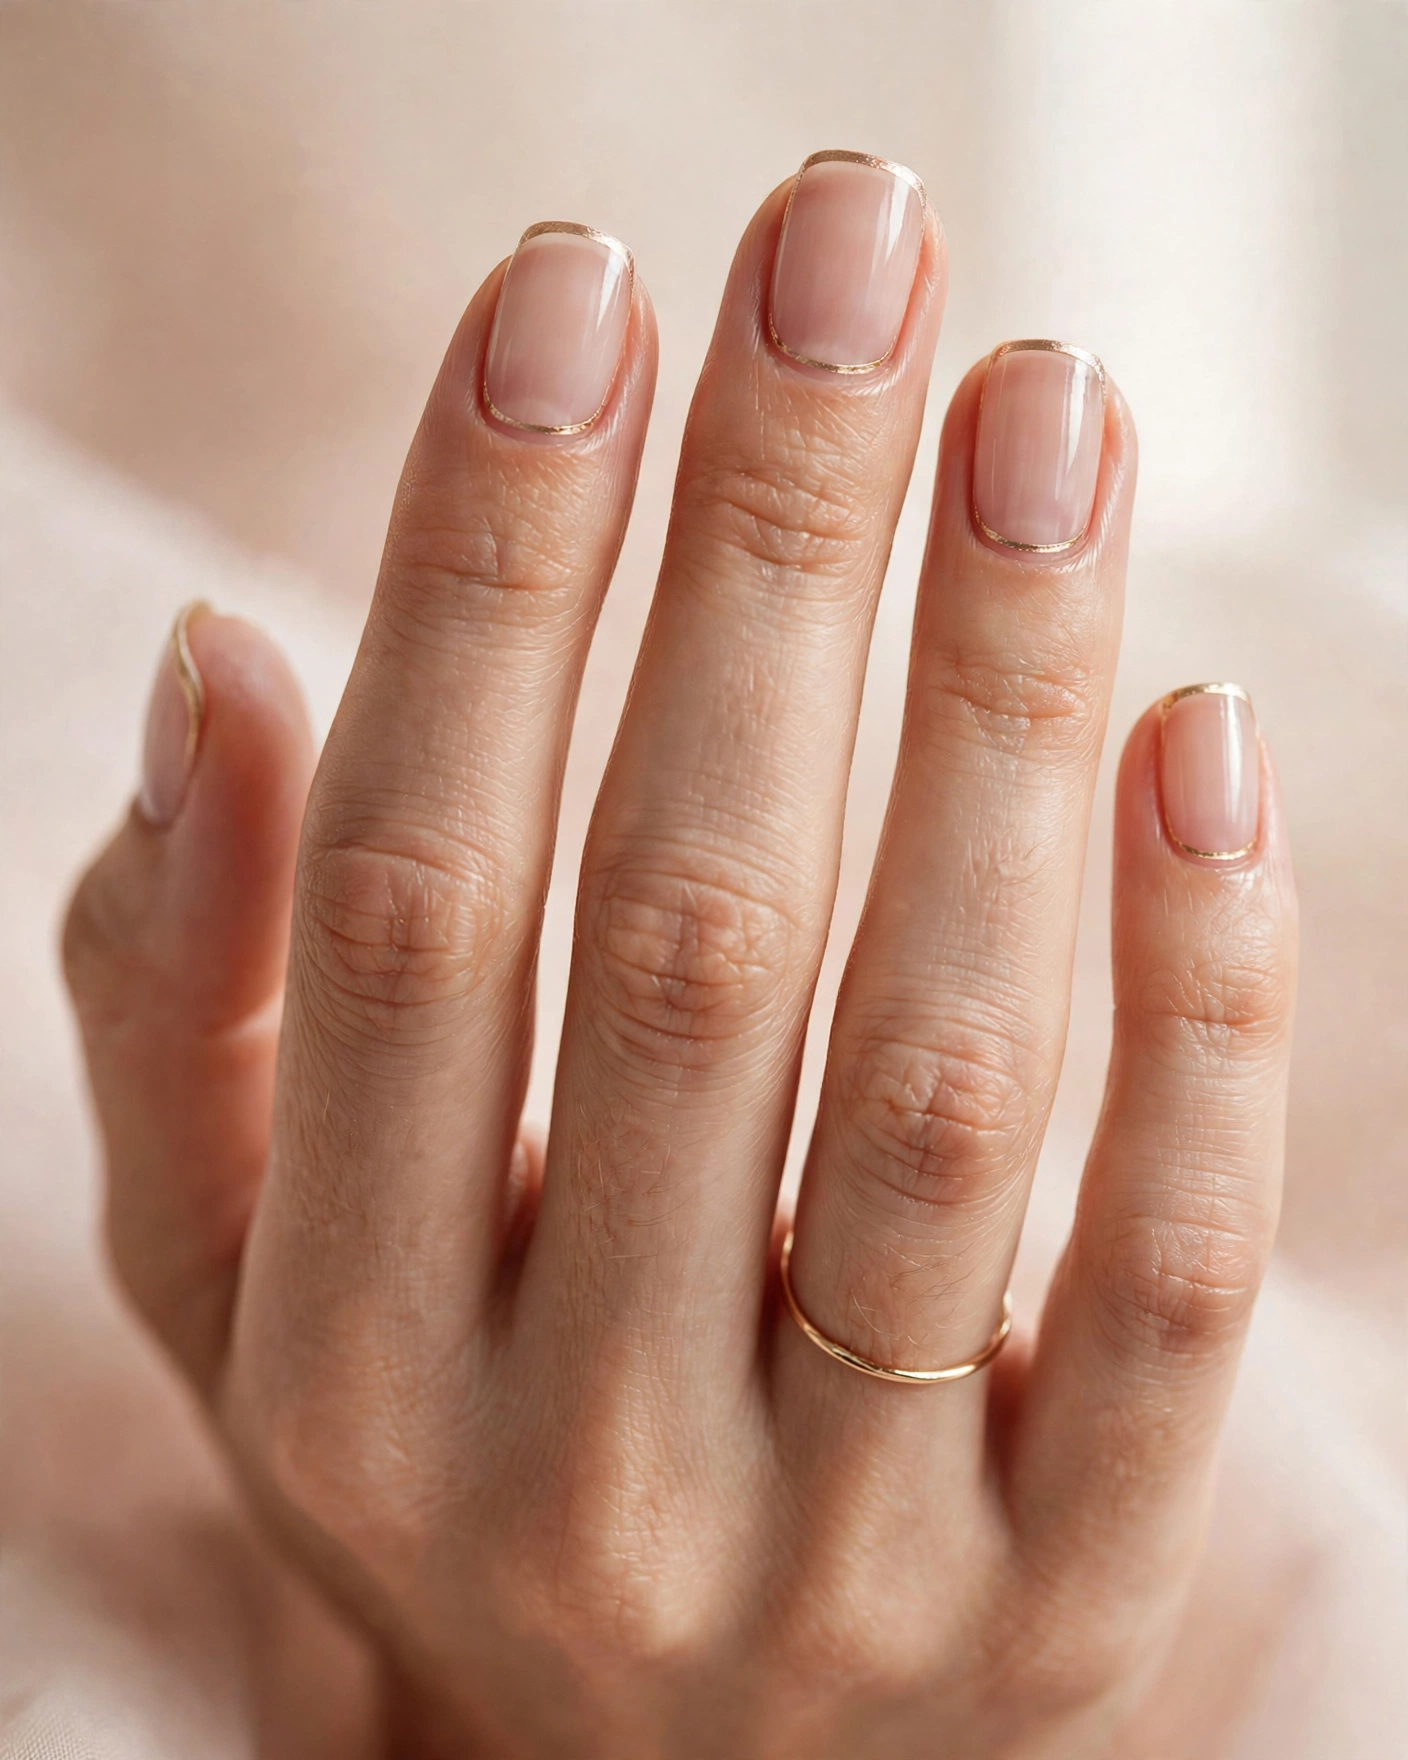
The look: the nail left entirely bare except for one hairline of champagne gold following the cuticle curve. From a distance it reads as a bare manicure; up close, it’s jewelry.
Shape and length: short to medium squoval or oval.
Colors and finish: champagne-gold metallic on a natural nail, glossy top coat.
Difficulty: easy — a striping brush or even a fine liner brush handles the single curve.
Why choose it: if your workplace side-eyes nail art, this is your loophole. It also photographs beautifully against rings, which is half the reason it keeps resurfacing on Pinterest each winter.
3. Matte Black Triangles

The look: one crisp matte-black triangle centered on each bare nail. Graphic, architectural, a little bit gallery-opening.
Shape and length: medium almond; the pointed shape plays well with the geometry.
Colors and finish: matte black over a bare nail with a glossy top coat only on the triangle.
Difficulty: easy — painter’s tape cut into triangles does the measuring for you.
Why choose it: the matte-against-bare contrast is what makes this look expensive rather than harsh. It’s the design to pick when you want edge without committing to a full dark manicure.
4. Terracotta Chevrons
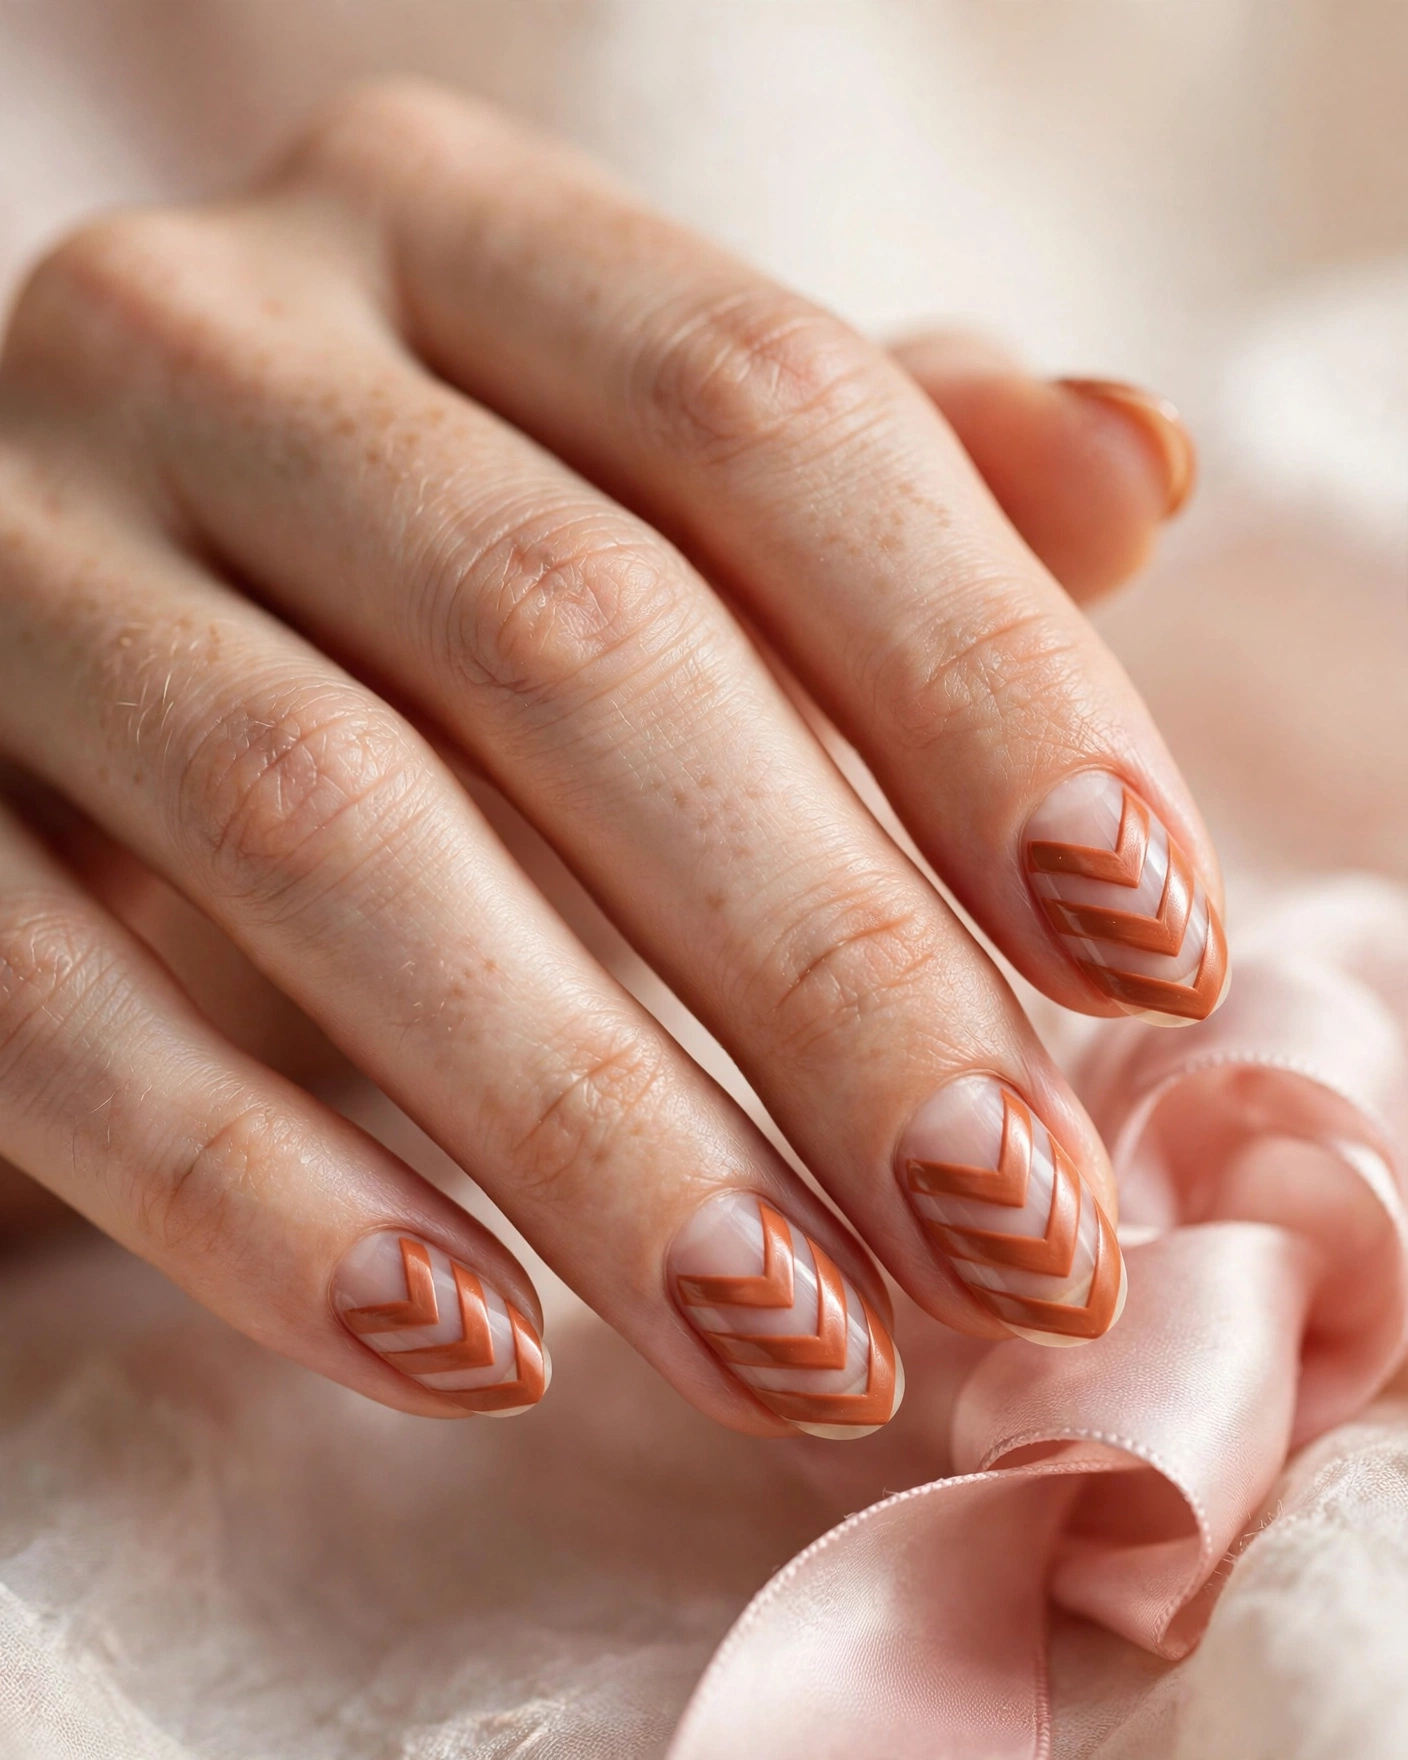
The look: two or three stacked chevrons in warm terracotta, with bare nail showing through the gaps between them. The angles draw the eye upward, which lengthens the finger.
Shape and length: medium oval.
Colors and finish: terracotta, satin finish — matte enough to feel modern, not flat.
Difficulty: medium — chevrons want a steady hand or striping tape, and spacing matters.
Why choose it: this is the best optical-illusion design in the collection. Shorter fingers look longer under chevrons, and the warm tone works with the browns and creams most of us wear through December. A silk ribbon and these nails is a whole winter mood.
5. The Diagonal Burgundy Block
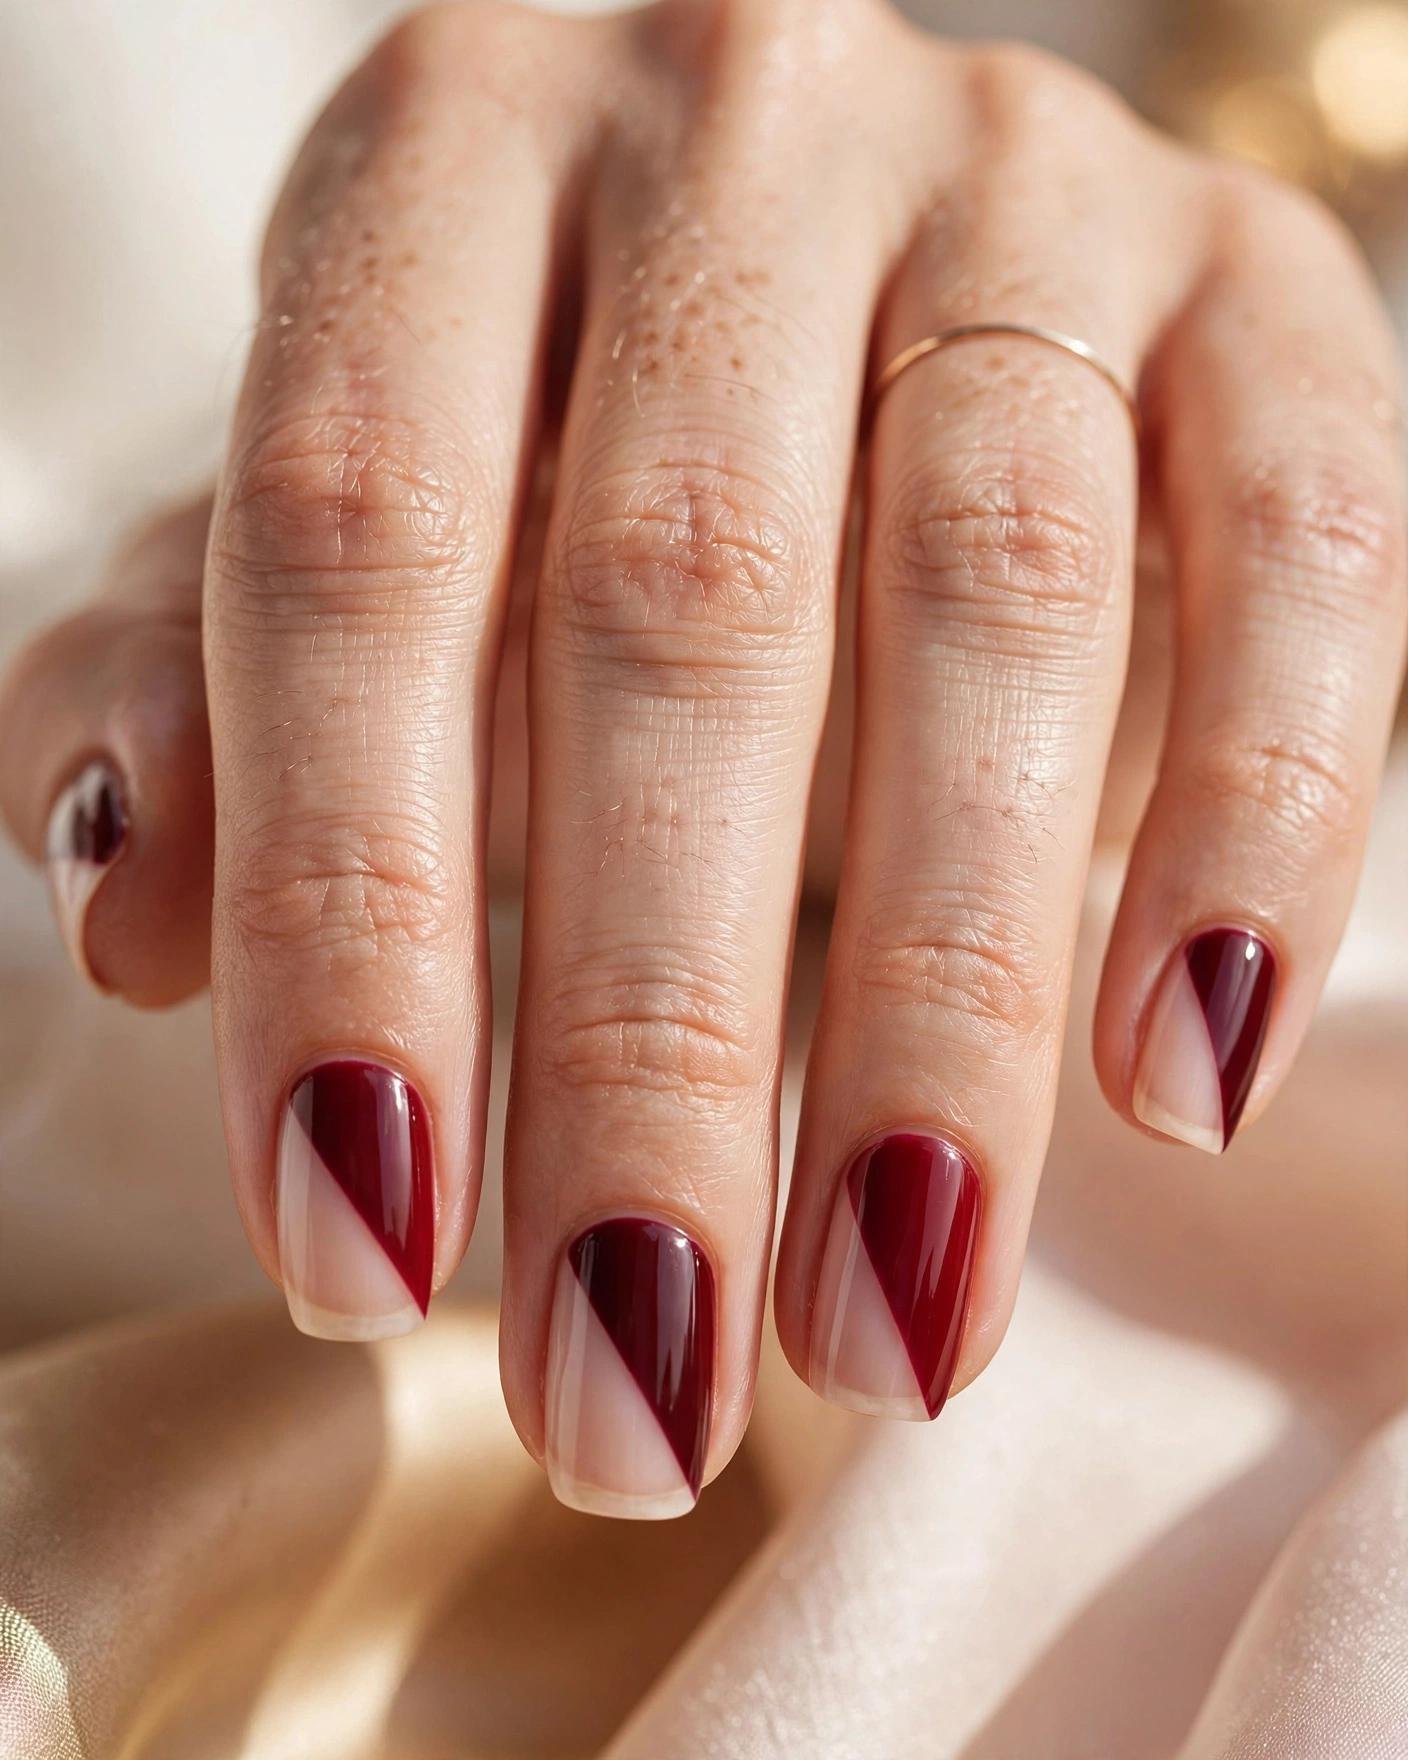
The look: one sharp diagonal divides each nail — burgundy on one side, bare nail on the other. Bold from across the room, precise up close.
Shape and length: medium squoval; straight edges make the diagonal read cleanly.
Colors and finish: deep burgundy-red, high gloss.
Difficulty: easy to medium — one piece of tape per nail, one straight line.
Why choose it: burgundy is winter’s default red, but a full burgundy manicure can feel expected. The bare wedge keeps it interesting, and it’s the fastest way here to get a look people ask about. If you love our burgundy wine nail designs, this is their minimalist cousin.
6. Hairline Gold Stripes
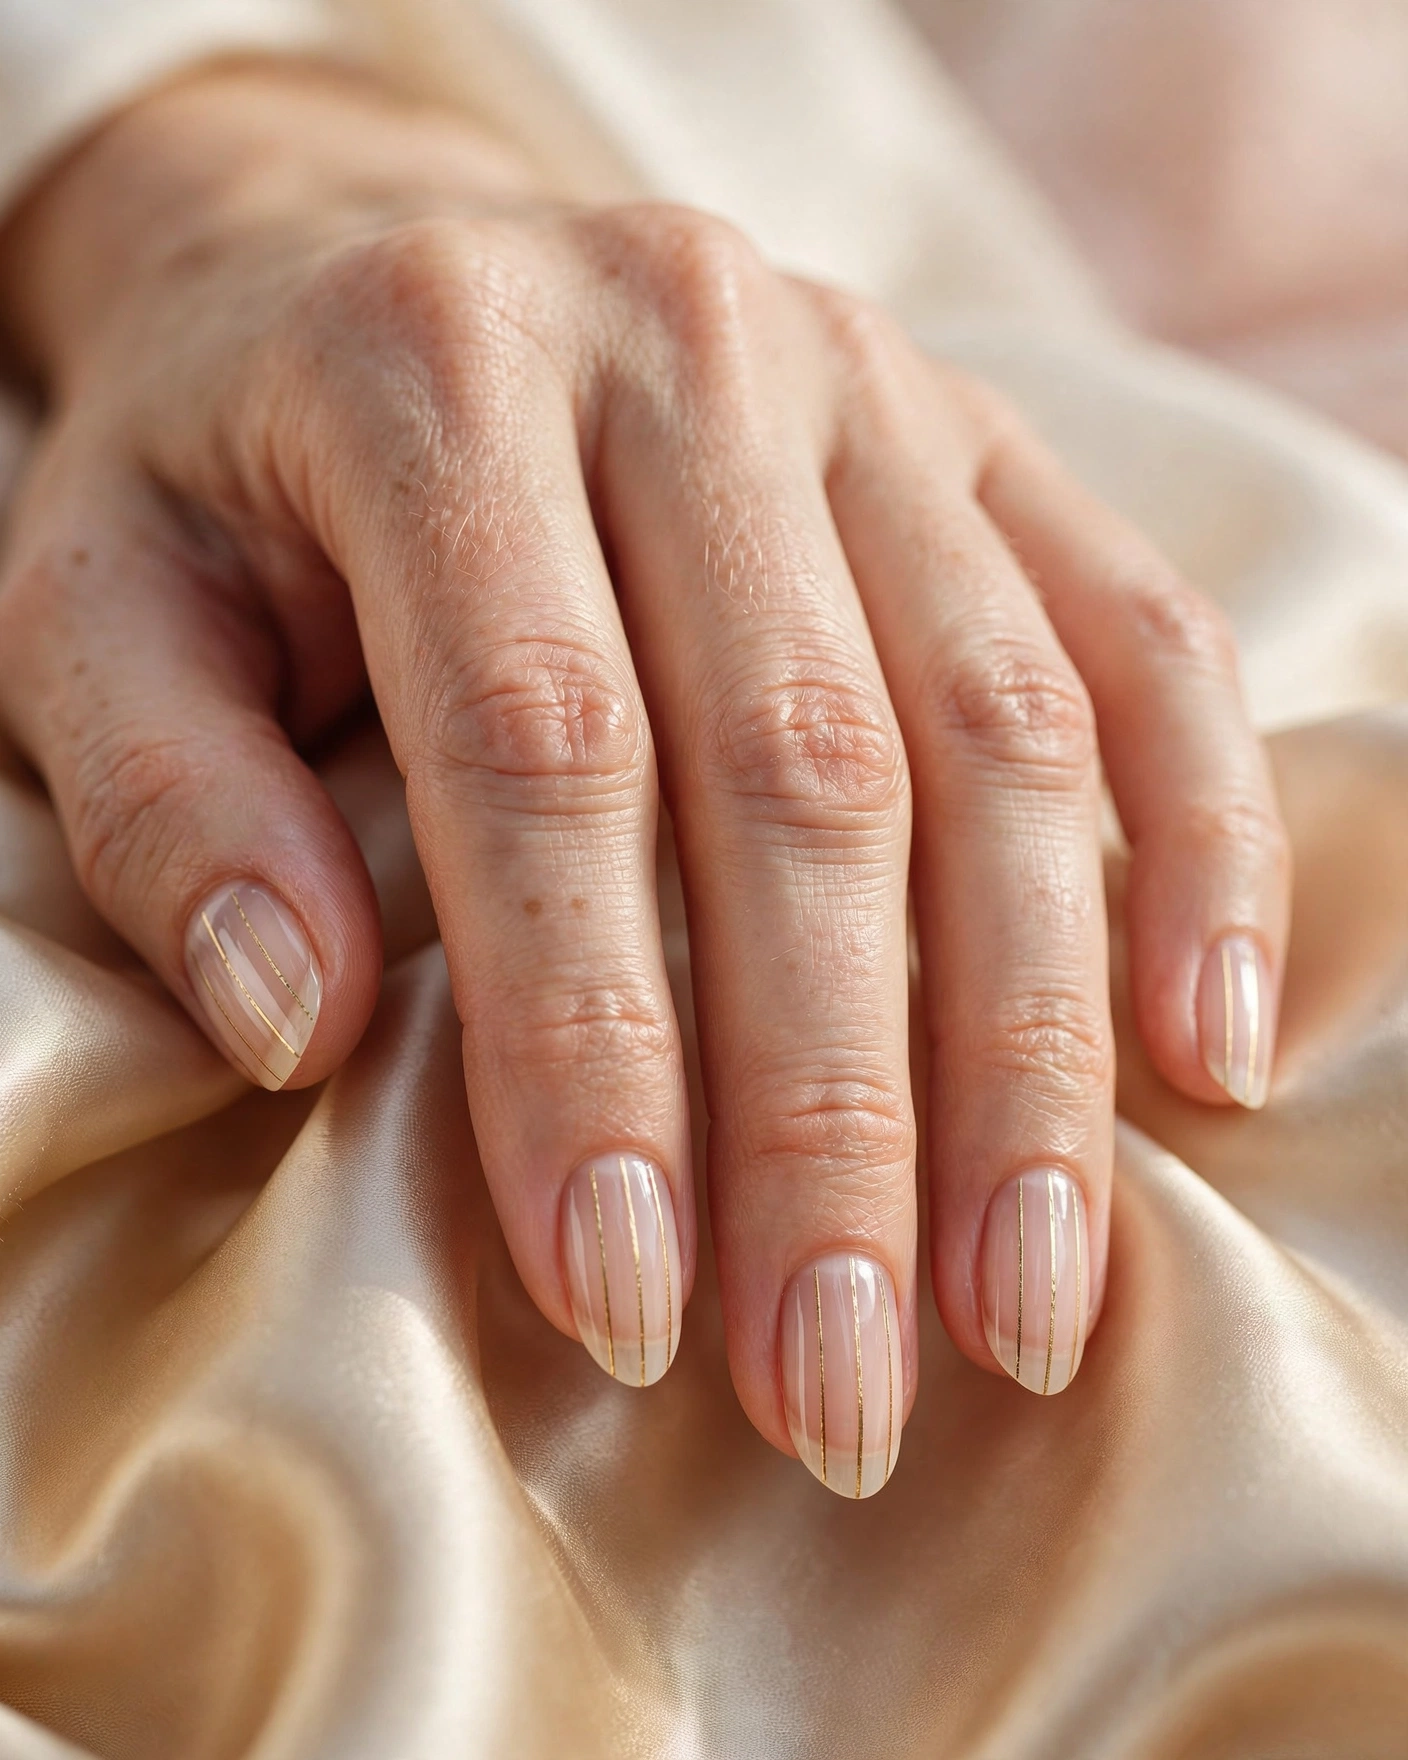
The look: two or three hairline gold stripes running the length of each bare nail. Vertical lines make nails look longer; gold makes everything look richer.
Shape and length: medium almond or oval.
Colors and finish: champagne gold on bare nail, glossy.
Difficulty: easy — nail striping tape gives perfectly straight lines with zero brush skill.
Why choose it: this is the five-minute version of luxury. The stripes elongate the nail visually, which is why this design flatters wider nail beds especially well, and it pairs with gold jewelry without competing with it.
7. Dot Constellations
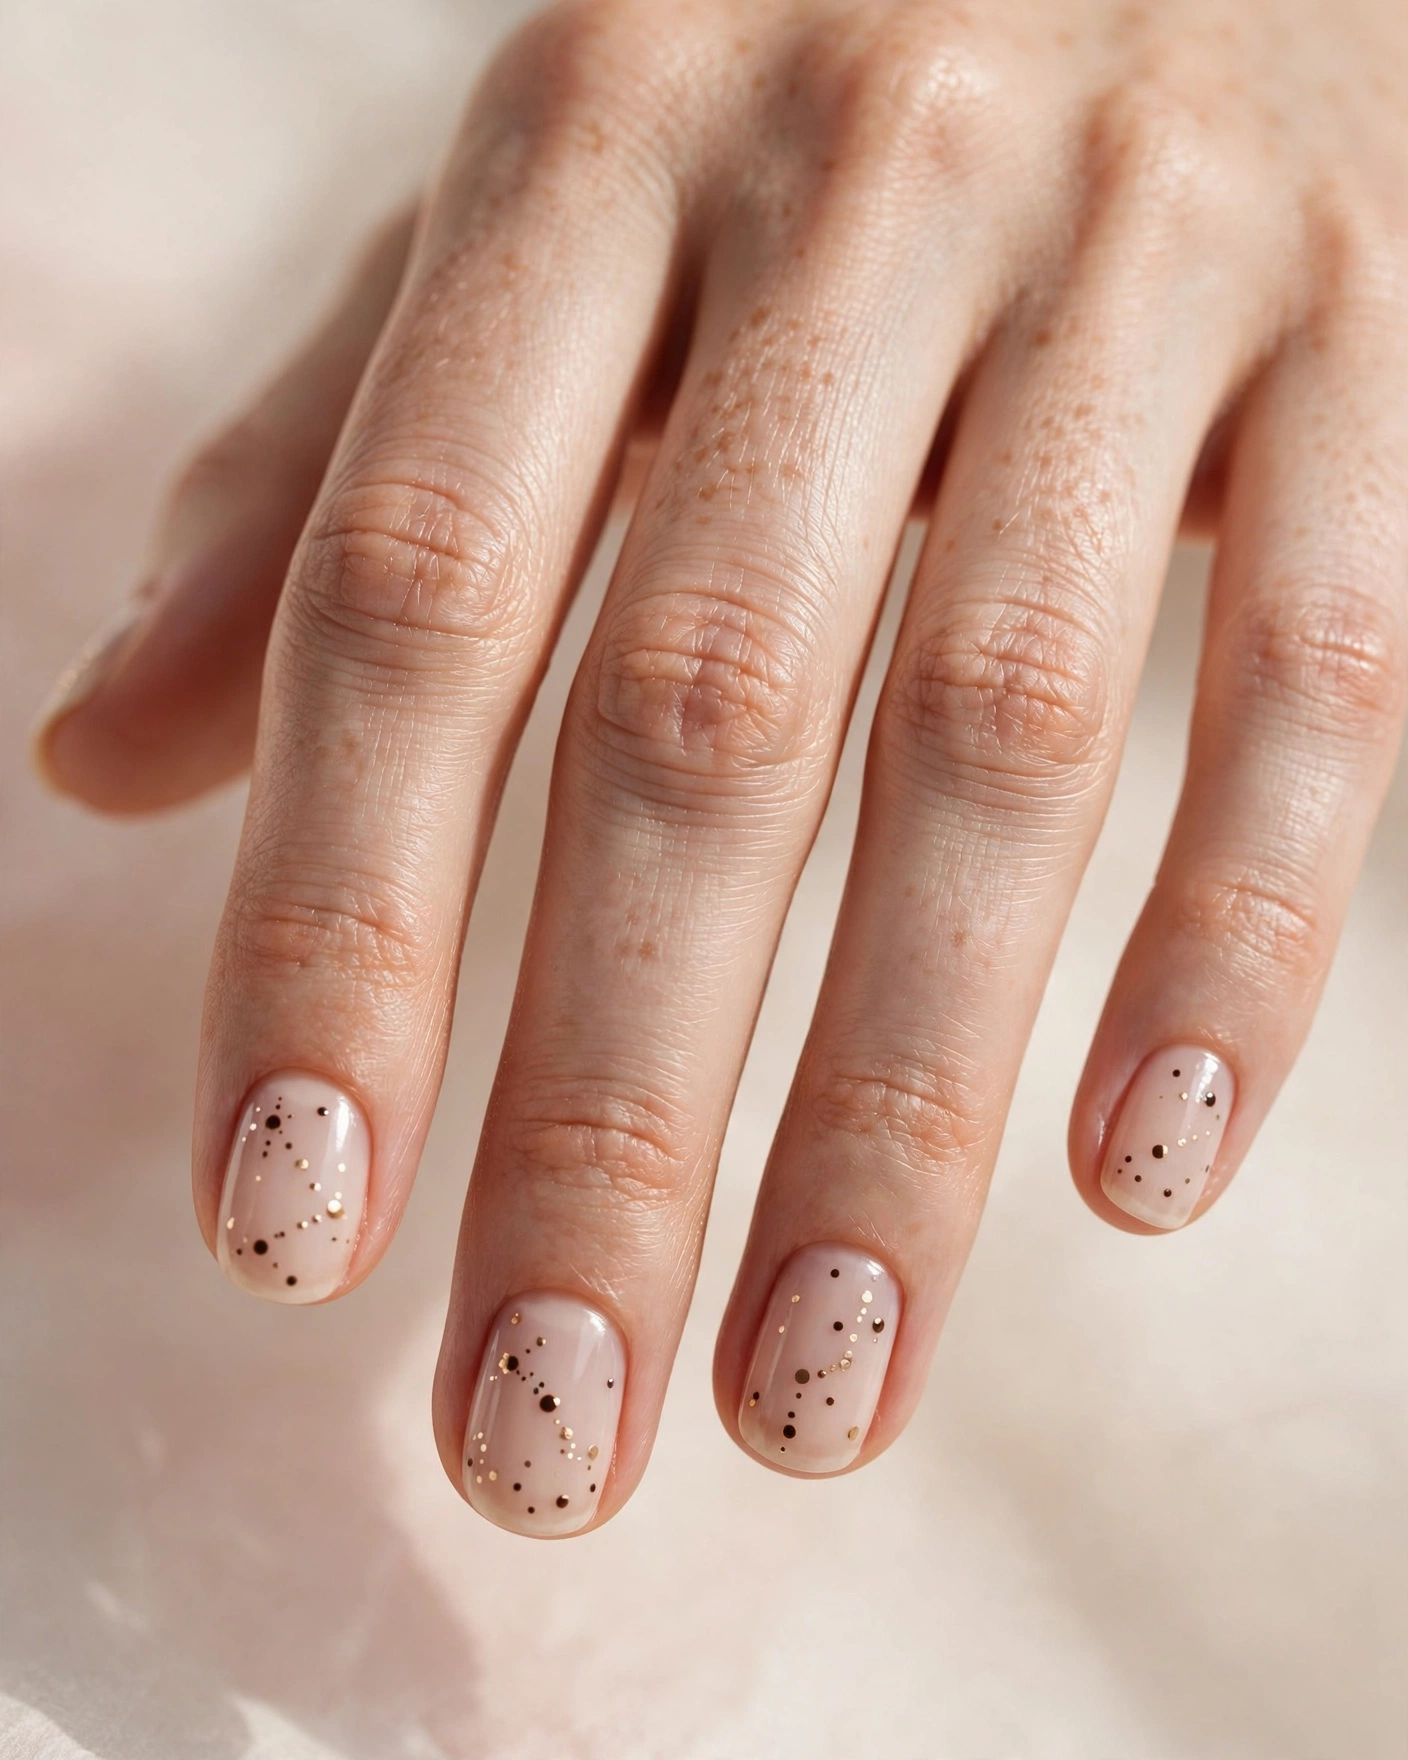
The look: small scattered dots in espresso and gold across bare nails, like a star chart. No two nails need to match — that asymmetry is the point.
Shape and length: short round; small nails keep the dots in proportion.
Colors and finish: espresso brown and champagne gold dots, glossy.
Difficulty: easy — a dotting tool or the end of a bobby pin is all you need.
Why choose it: this is the most forgiving design in the collection. Dots have no straight lines to wobble and no symmetry to fail, so it’s genuinely beginner-proof — and it’s one of the few statement looks that works beautifully on very short nails.
8. Blush Sunburst Rays

The look: fine blush-pink rays fanning out from each cuticle like a sunrise, with bare nail between them. Soft, romantic, and very different from the geometric looks above.
Shape and length: medium to long almond; longer nails give the rays room to spread.
Colors and finish: blush pink on bare nail, glossy.
Difficulty: medium — the rays need to be evenly spaced, which takes a steady hand or a stencil.
Why choose it: most negative-space designs skew cool and architectural. This is the warm one. The pink reads almost like a flush from within, and it’s the design I’d pick for a winter wedding guest look — it photographs softly in daylight.
9. The Side Peek-a-Boo Window
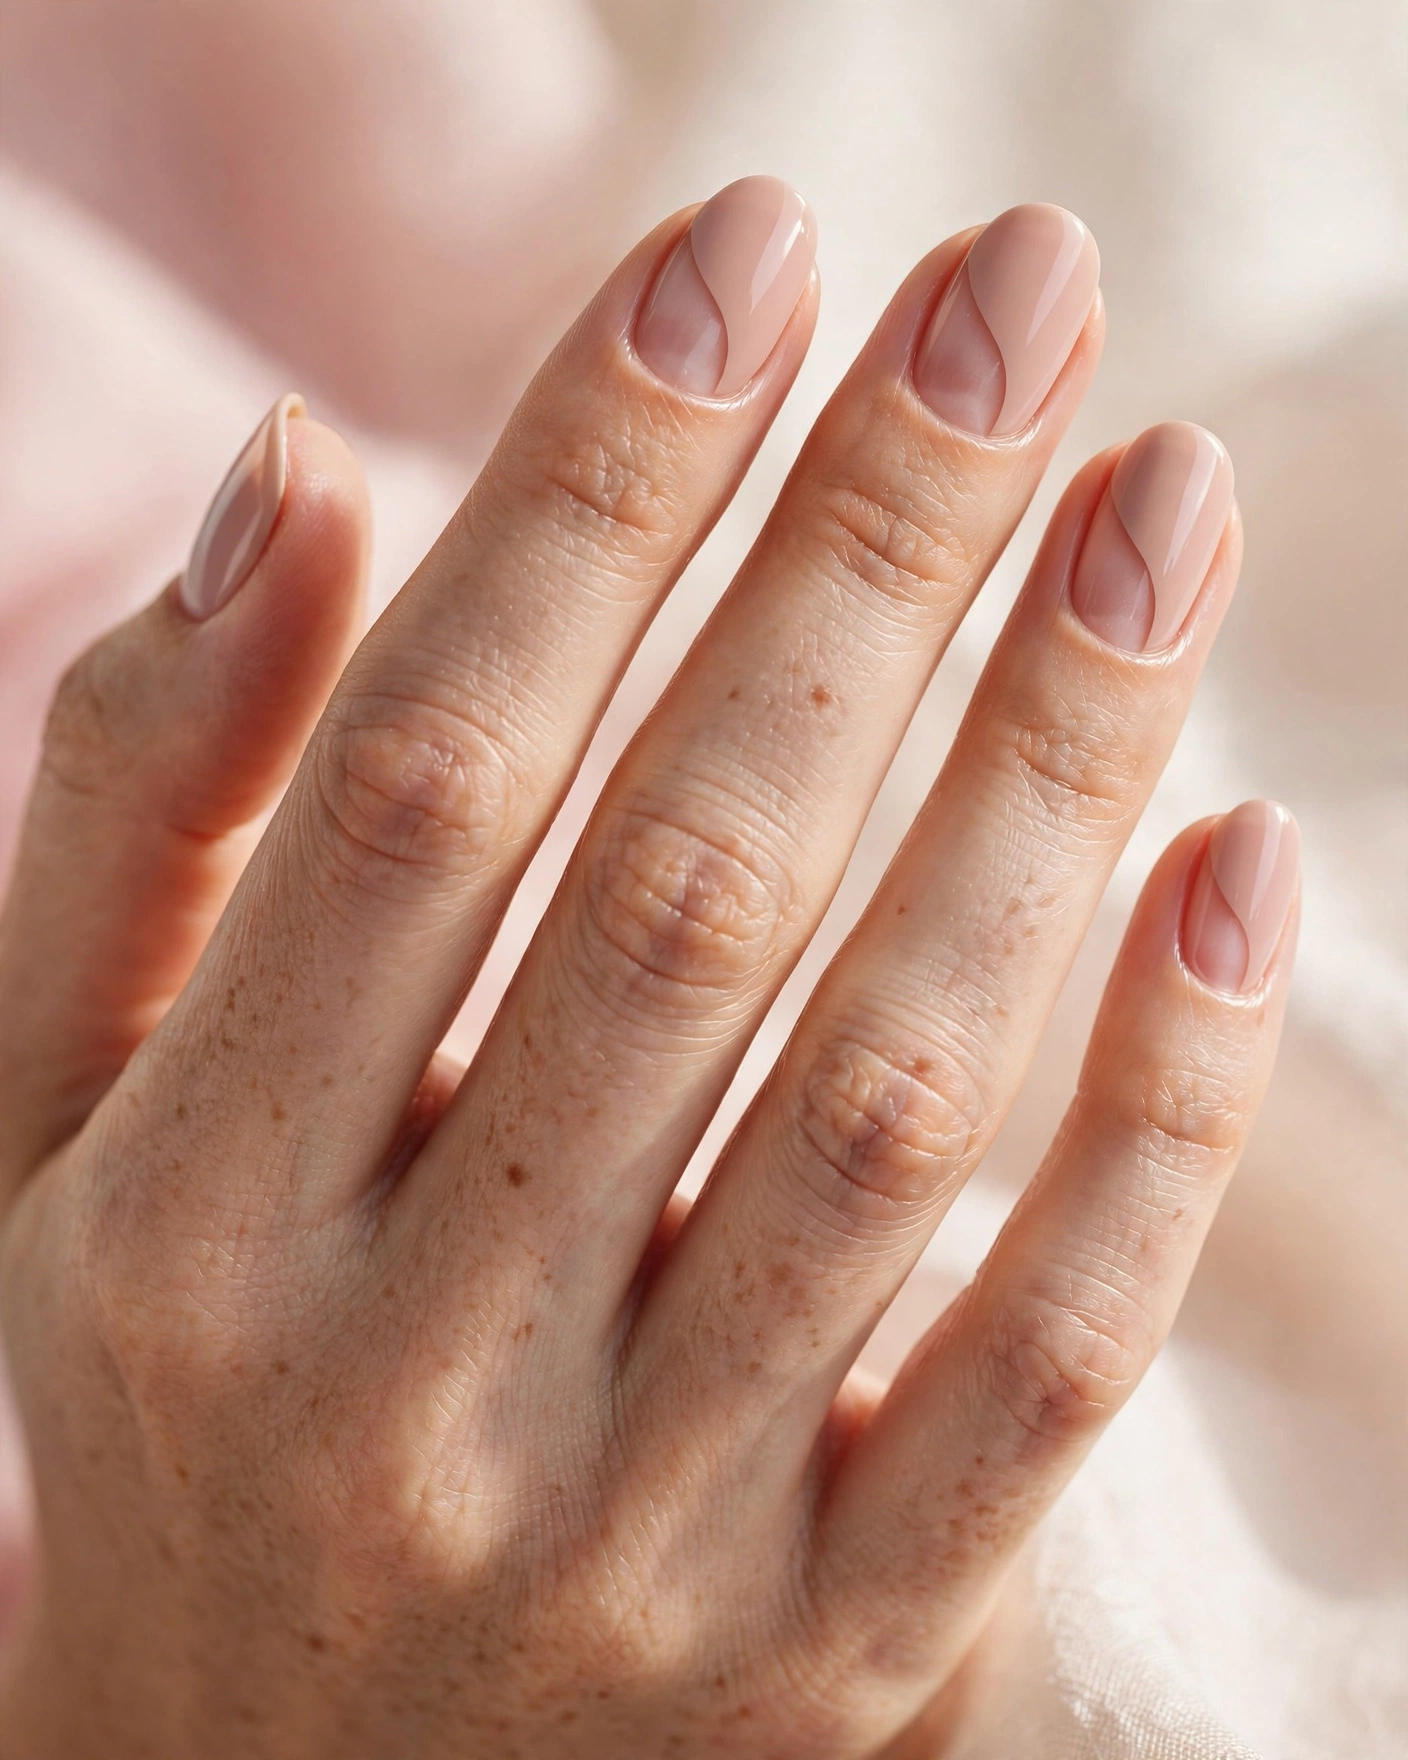
The look: blush-nude polish with a curved sliver of bare nail running down one side of each nail. You almost miss it at first — then you can’t stop noticing it.
Shape and length: medium oval.
Colors and finish: blush nude, glossy.
Difficulty: medium — the curve is freehand, but small imperfections hide in the nude tone.
Why choose it: this is negative space at its most subtle. If you want polish that looks professional in every meeting but still has a design secret, the side window is it. It also makes wide nails look narrower, thanks to the vertical bare line.
10. Bare-Center Hearts

The look: deep red polish with a small bare heart at the center of each nail. Sweet without being saccharine — the bare center keeps it graphic rather than girly.
Shape and length: short round; the small canvas keeps the heart crisp.
Colors and finish: deep red, glossy.
Difficulty: easy to medium — a heart hole-punch sticker on each nail gives a perfect shape.
Why choose it: winter is full of reasons for a red nail, from holidays to date nights, and the bare heart is the version that doesn’t look like everyone else’s. It’s also a genuinely good Valentine’s preview design — bookmark it for February.
11. The Espresso Checkerboard
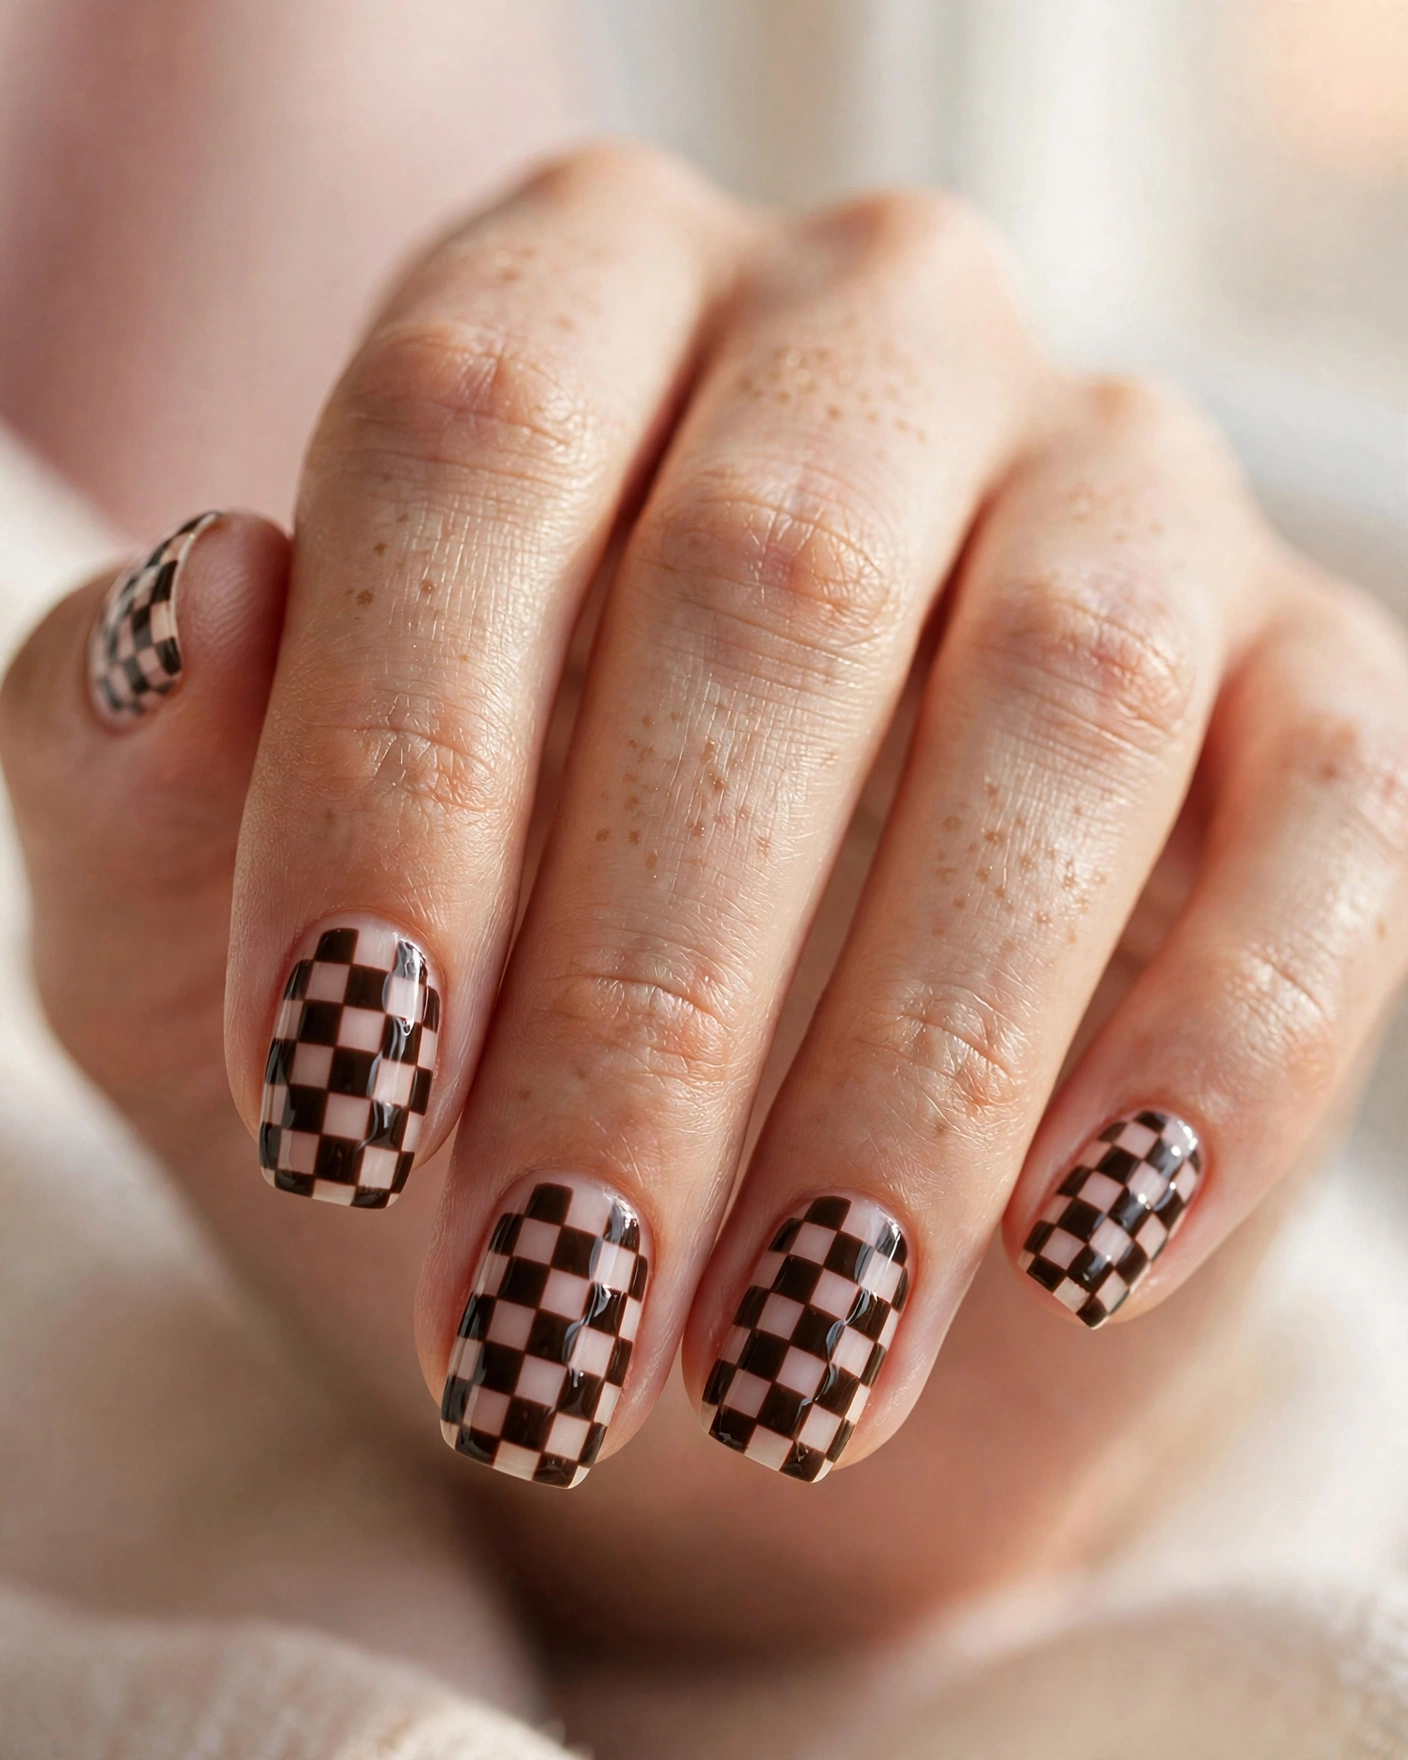
The look: tiny espresso-and-bare checkerboard squares across each nail. Retro, playful, and oddly sophisticated when the squares are small.
Shape and length: medium squoval; the flat edge keeps the grid aligned.
Colors and finish: espresso brown, glossy.
Difficulty: medium — small squares want either a stamping plate or patience with tape.
Why choose it: checkerboard is one of those patterns that reads “fashion person” immediately. Kept small and in espresso rather than black, it stays in LuxeSleek territory instead of skate-park territory. Pair it with a brown leather boot and thank me later.
12. Bare-to-Espresso Ombré
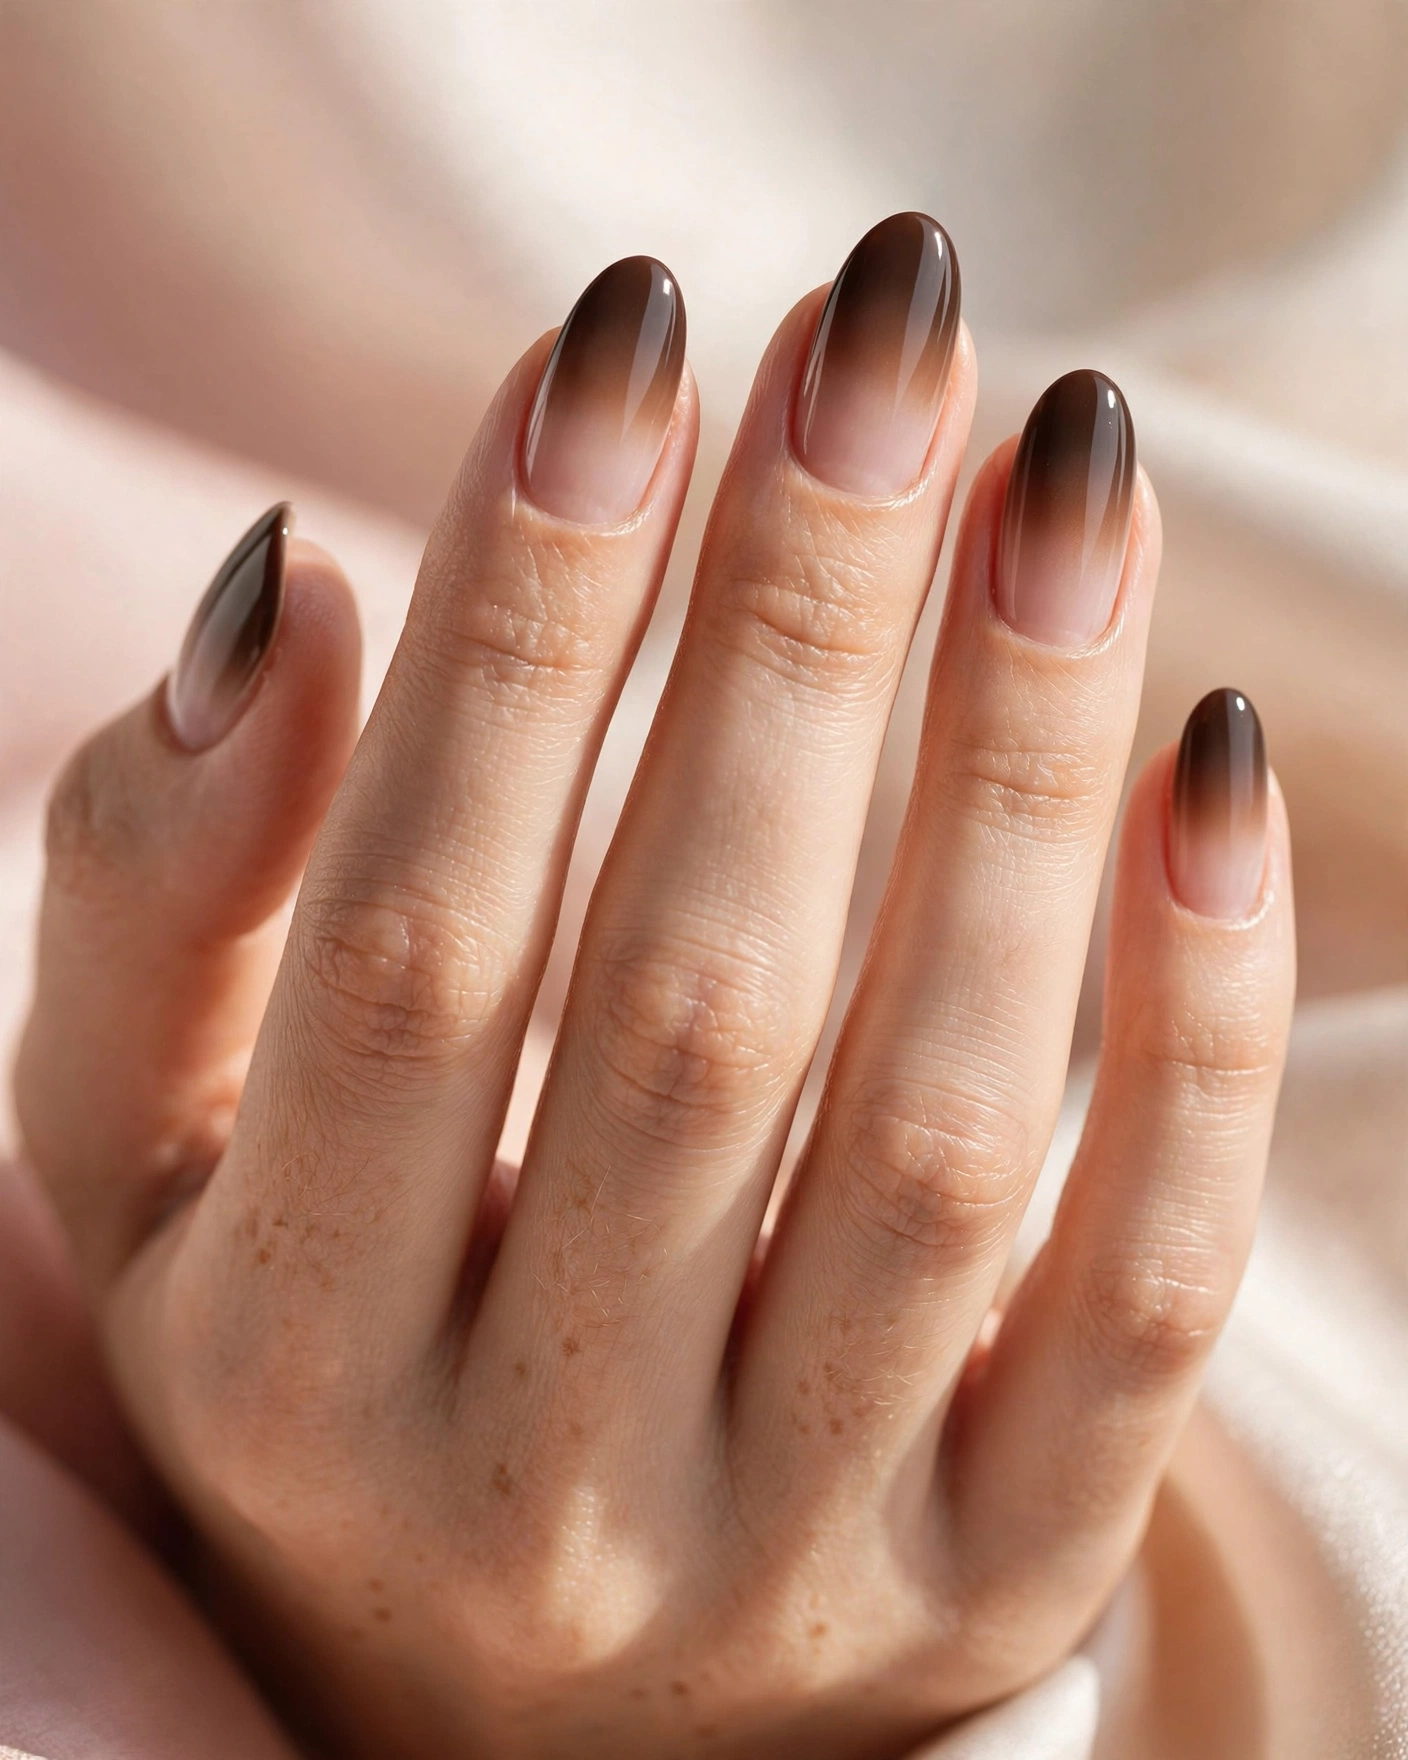
The look: the nail fades from completely bare at the cuticle to deep espresso at the tip. No hard line anywhere — just a slow dissolve into color.
Shape and length: medium to long almond; the gradient needs length to blend.
Colors and finish: sheer espresso fading over bare nail, glossy.
Difficulty: medium — sponge-blending a gradient takes practice, though sheer polish is forgiving.
Why choose it: this is the grown-out champion. Regrowth literally cannot show because the base is already bare, which is why ombré-from-bare is a salon favorite for clients who stretch appointments. It’s also the moodiest, most winter-evening design here — espresso tips read like the end of a good novel. For more on where this shade family is headed, see our winter nail trends roundup.
13. The Terracotta Squiggle
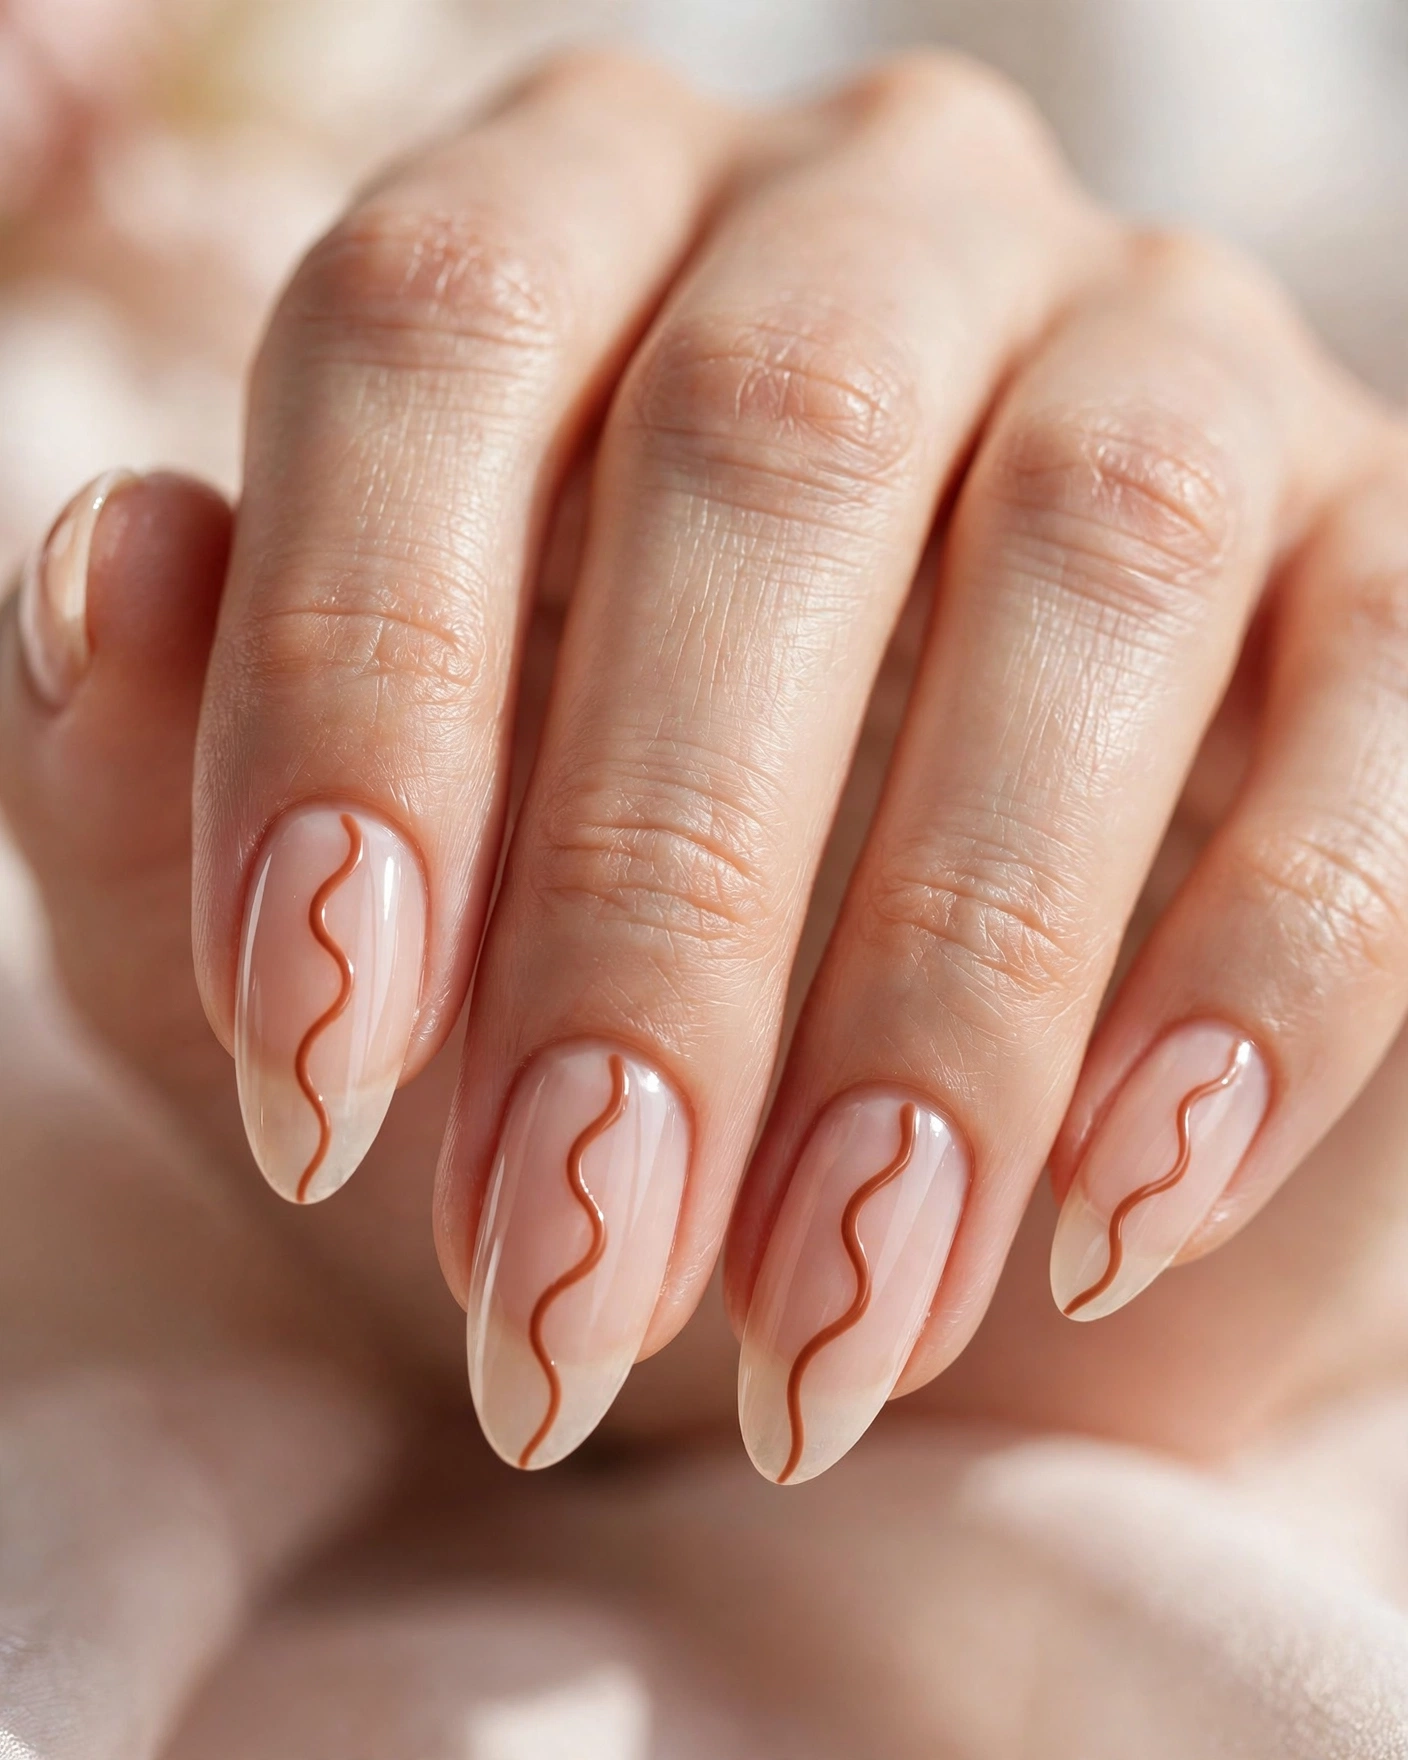
The look: one thin terracotta line wandering down the center of each bare nail. It shouldn’t be perfect — the organic wobble is the charm.
Shape and length: long almond or stiletto; the line needs runway.
Colors and finish: terracotta, glossy.
Difficulty: easy — genuinely. One wavy line, no symmetry, no straight edges.
Why choose it: this is the anti-perfectionist design, and it’s having a moment because it looks hand-painted in the good way. Long nails carry it best, and the terracotta tone keeps it warm against winter’s usual cool palette. If your hand shakes, this is the design that turns that into a feature.
14. The Gold Micro-French

The look: an ultra-thin gold edge on an otherwise bare nail — a French manicure reduced to its absolute minimum.
Shape and length: short to medium squoval.
Colors and finish: metallic gold tip, glossy.
Difficulty: easy to medium — the line is thin, so it wants a careful brush, but there’s very little of it.
Why choose it: this is the design for people who find classic French tips a bit much. The gold edge catches light when you move your hands, which is a quiet kind of drama. Our French tip methods, ranked guide covers the technique basics if you want to practice the smile line first.
15. Double Gold Cuticle Arcs
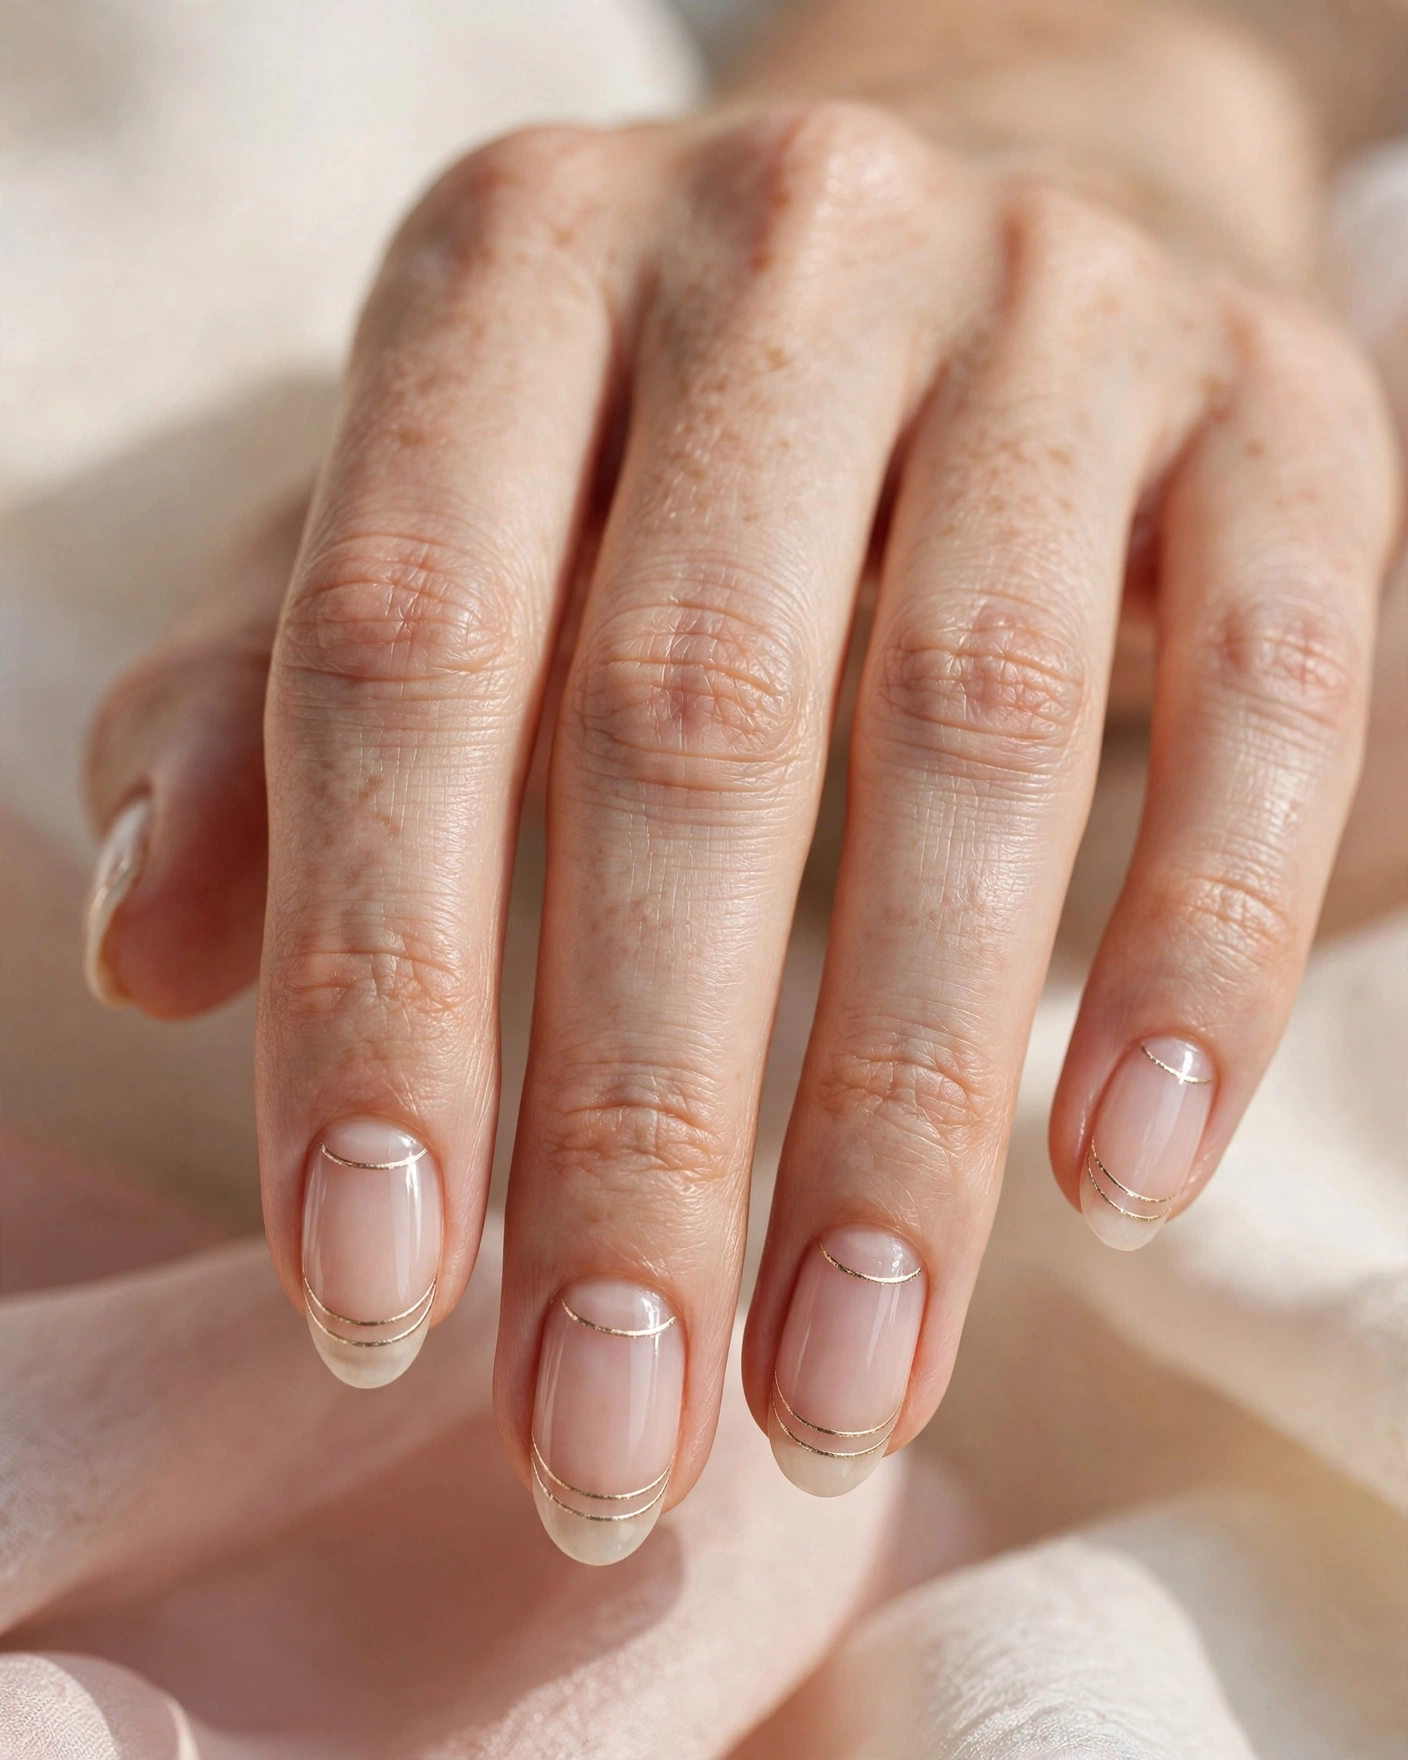
The look: two thin gold arcs tracing each cuticle on a bare nail — like the echo of a half-moon, drawn twice. Minimal, precise, a little bit deco.
Shape and length: medium almond or oval.
Colors and finish: champagne gold on bare nail, glossy.
Difficulty: easy to medium — two parallel curves want a steady hand, but short strokes help.
Why choose it: if idea 2 (the single gold trace) felt too quiet, the double arc is its bolder sibling without losing the minimalism. It’s the design I recommend to brides who want “something” on their nails in photos without any color competing with the dress.
16. Emerald Snowflakes with Bare Centers

The look: white snowflakes on deep emerald, each with a tiny bare circle at its center where the natural nail shows through. That bare dot is small, but it’s what makes people look twice.
Shape and length: short round.
Colors and finish: deep emerald green with white detail, glossy.
Difficulty: medium — snowflakes want a fine brush or stamping; the bare center just needs a steady dot of patience.
Why choose it: snowflake nails usually go full-coverage and full-sweet. The emerald base keeps this one grown-up, and the bare center is the detail that makes it a negative-space design rather than just holiday art. Our emerald green nail designs collection has more ways to wear this shade if you fall for it.
17. The Champagne Diamond Mosaic
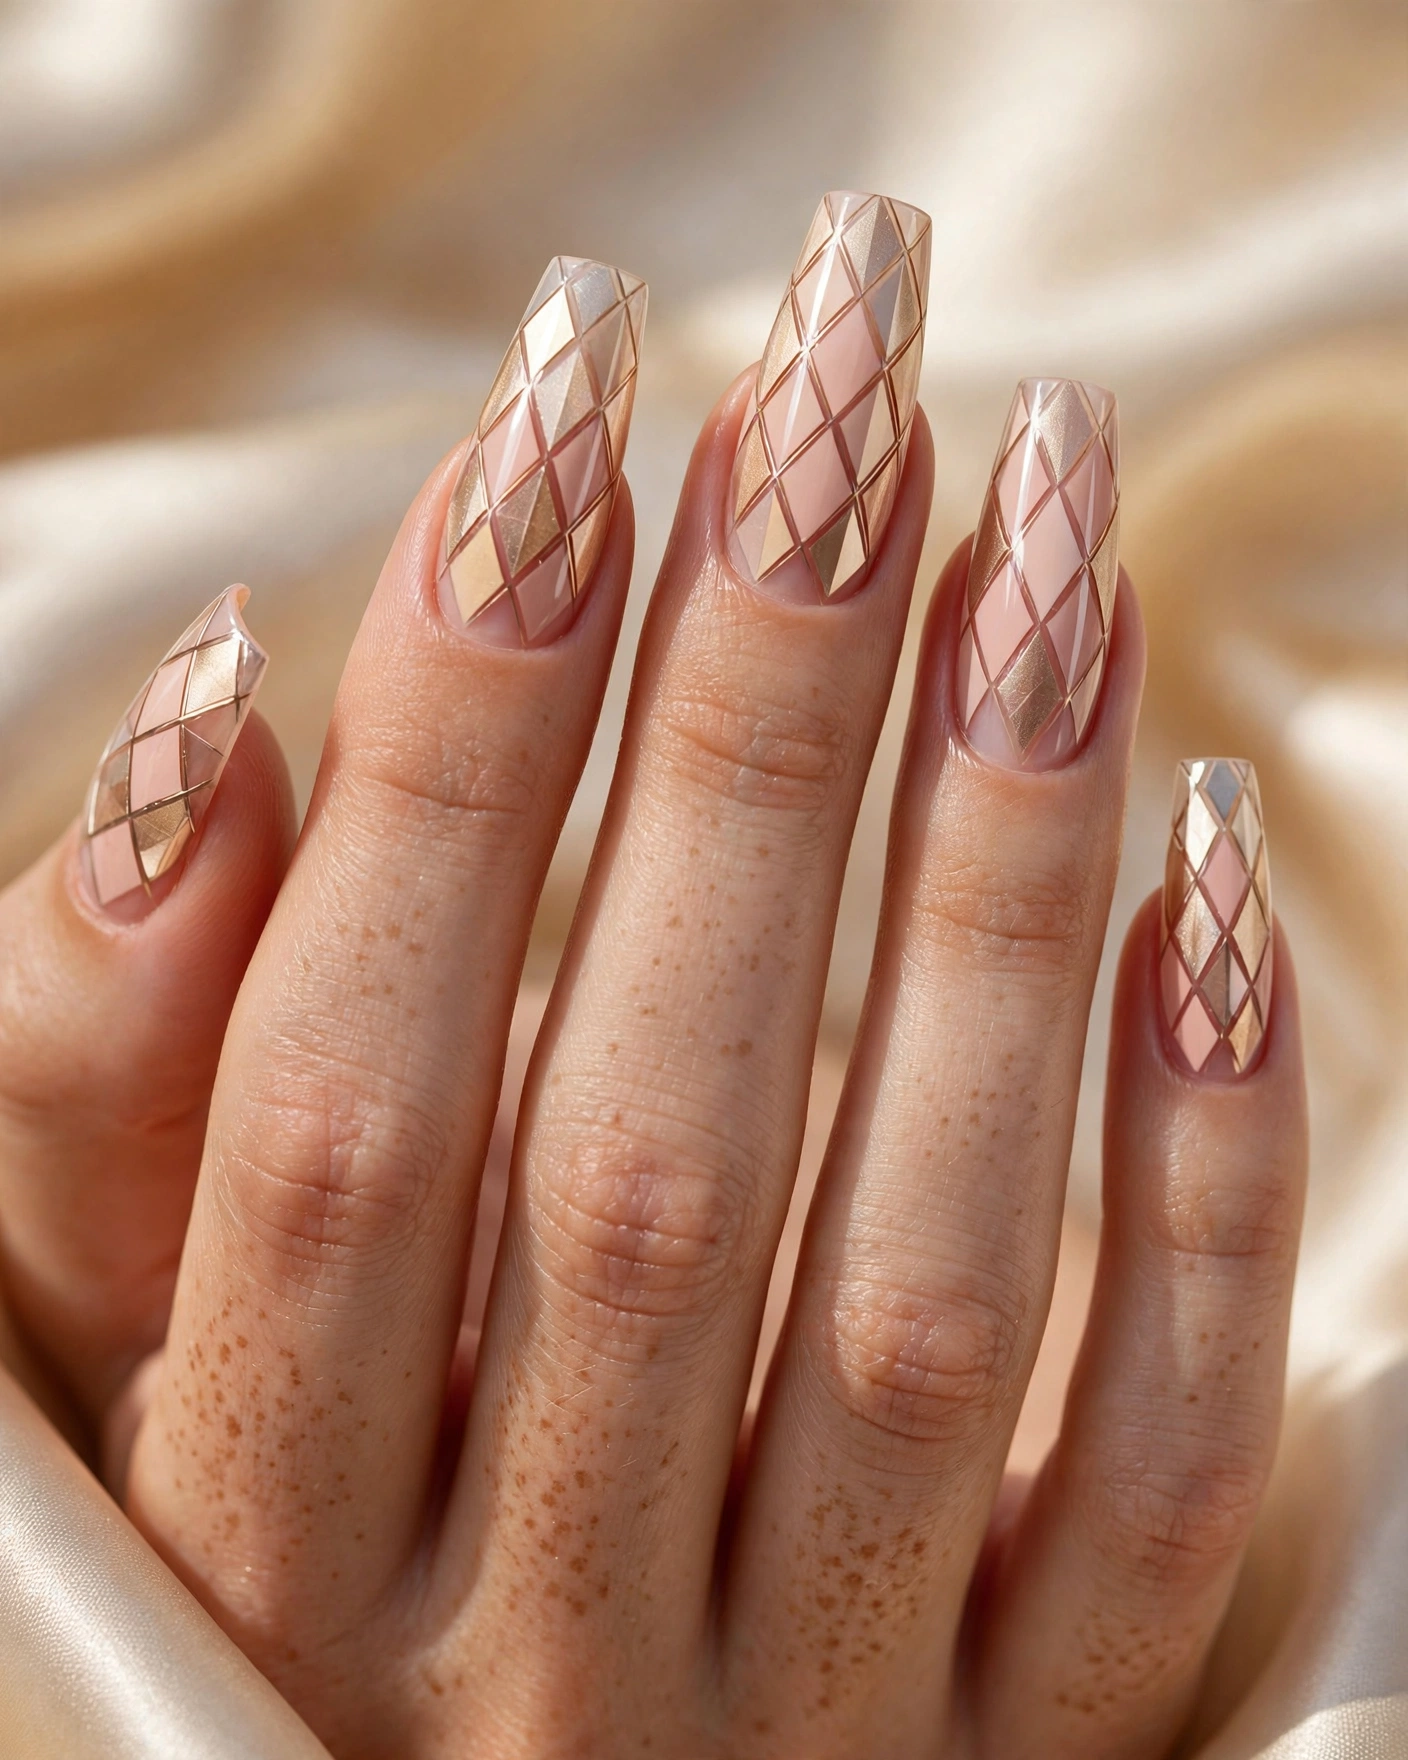
The look: an art-deco diamond mosaic in champagne and blush, with thin bare gaps separating the shapes. This is the statement piece of the collection — the one that looks like it took a salon three hours (it doesn’t have to).
Shape and length: long coffin; the pattern needs real estate.
Colors and finish: champagne gold and blush pink, glossy.
Difficulty: medium to hard — the most complex design here, but striping tape turns the diamonds into a fill-in-the-blanks exercise.
Why choose it: for New Year’s Eve, a winter wedding, or any night you want your hands to be part of the outfit. The bare gaps are what keep it from reading as heavy — they’re the breathing room that makes the gold look expensive instead of loud.
18. Navy Moon-Phase Crescents

The look: deep navy polish with a small gold-outlined crescent on each nail, the crescent’s interior left as bare natural nail. Celestial, but make it winter-evening.
Shape and length: medium almond.
Colors and finish: deep navy with champagne-gold outline, glossy.
Difficulty: medium — the crescent shape wants a careful hand or a small sticker guide.
Why choose it: navy is winter’s underrated dark — softer than black, richer than grey — and the bare crescent interior glows against it like actual moonlight. This is the design for anyone who wants celestial nails without the glitter-and-stars cliché. If icy tones are more your thing, our frosty icy blue winter nails lean into the same mood.
19. The Burgundy V-Cut French
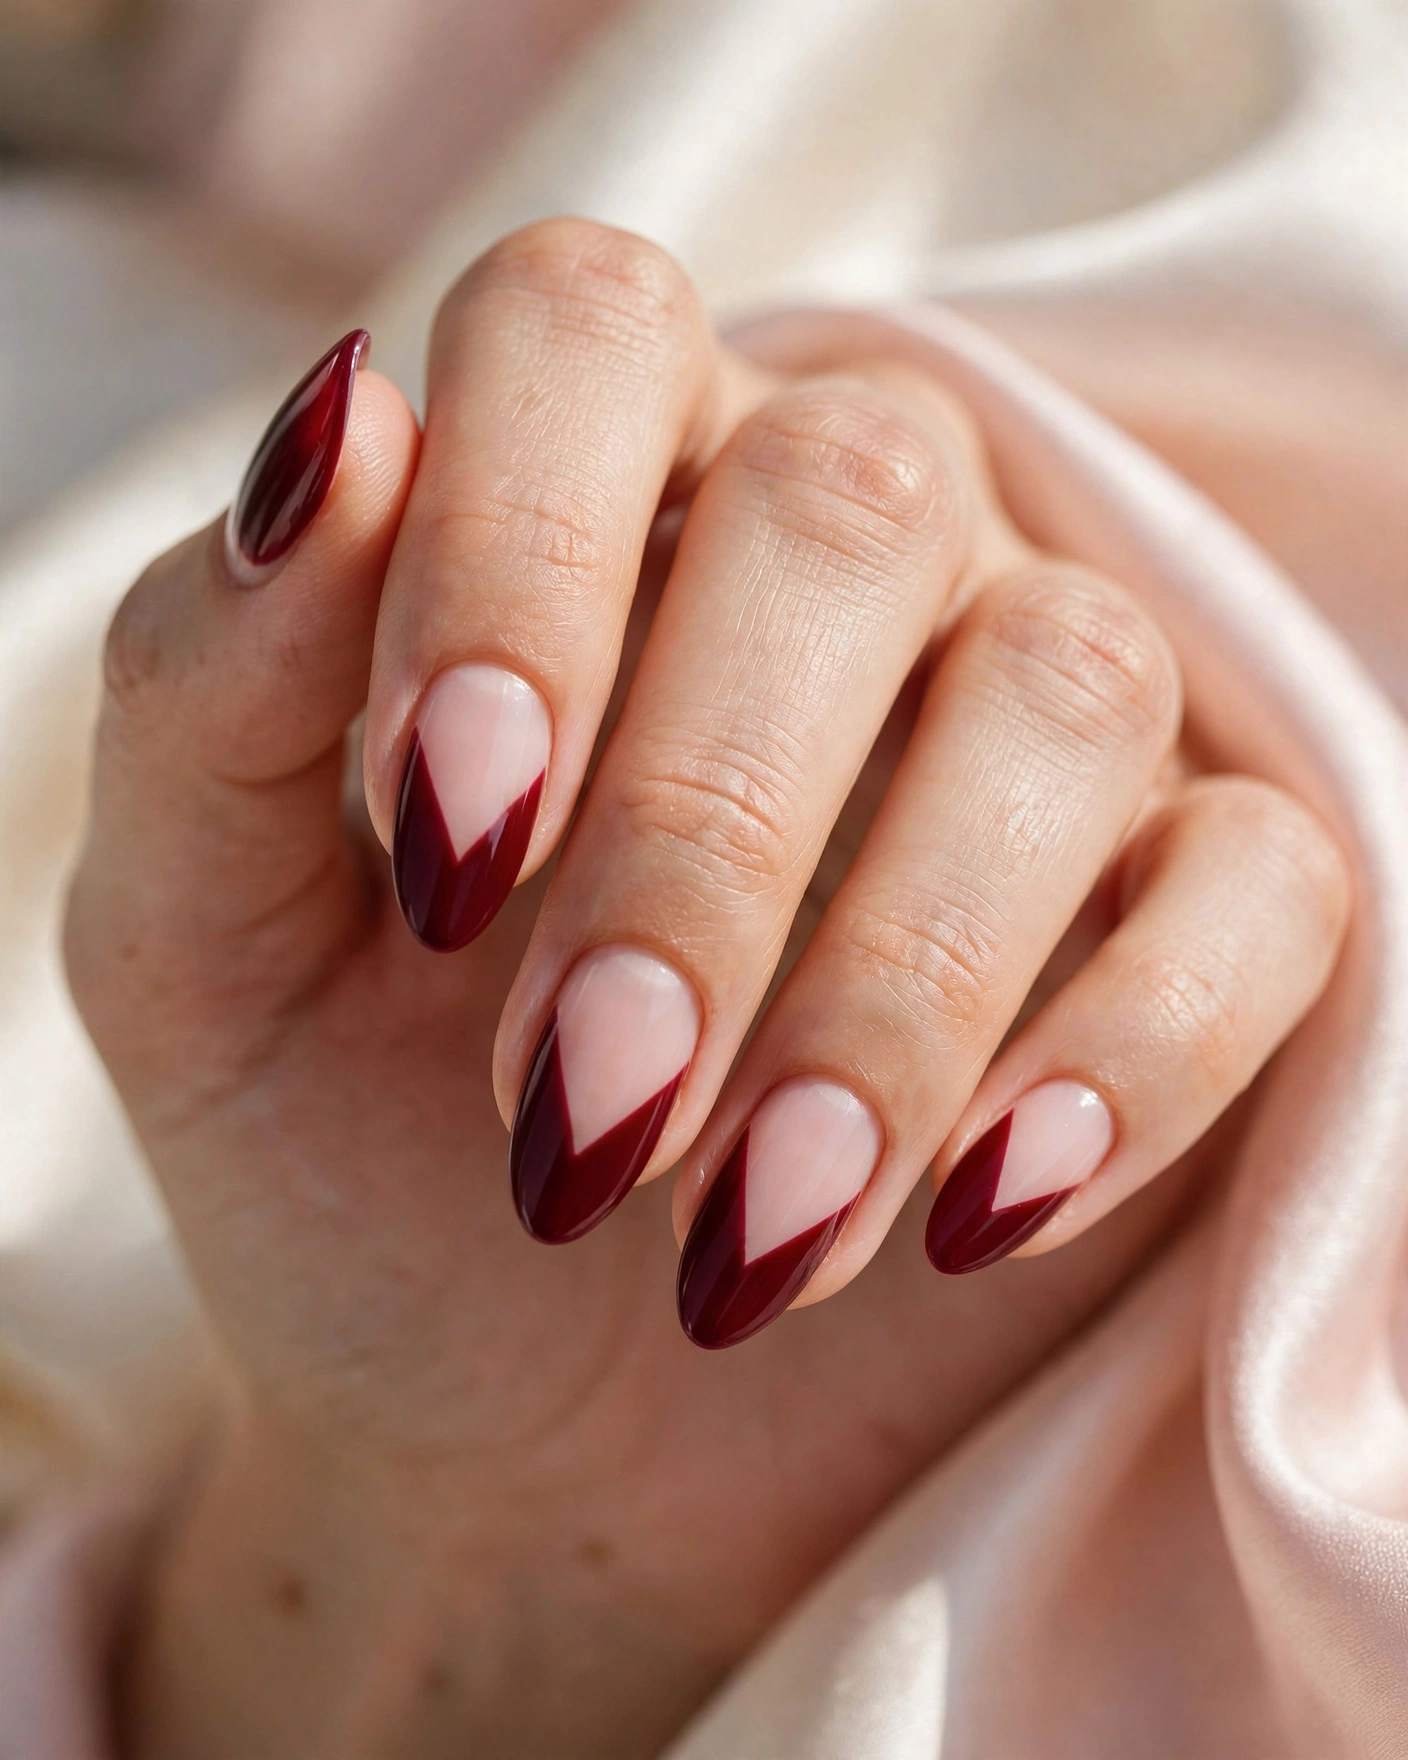
The look: a sharp V of burgundy at each tip, the base left bare. It’s a French manicure with an opinion — the V points the eye toward the cuticle and makes the whole nail look longer.
Shape and length: medium to long almond or stiletto; the V needs length to make its point.
Difficulty: medium — two straight lines meeting at a point, best done with tape.
Why choose it: the V-cut is the most elongating French variation there is, which is why it suits shorter nail beds particularly well. It reads powerful rather than pretty — the manicure equivalent of a sharp shoulder line. Thinking about which shape carries it best? Our nail shape guide breaks down almond, oval and squoval in detail.
20. Grey-and-Gold Marble Veins
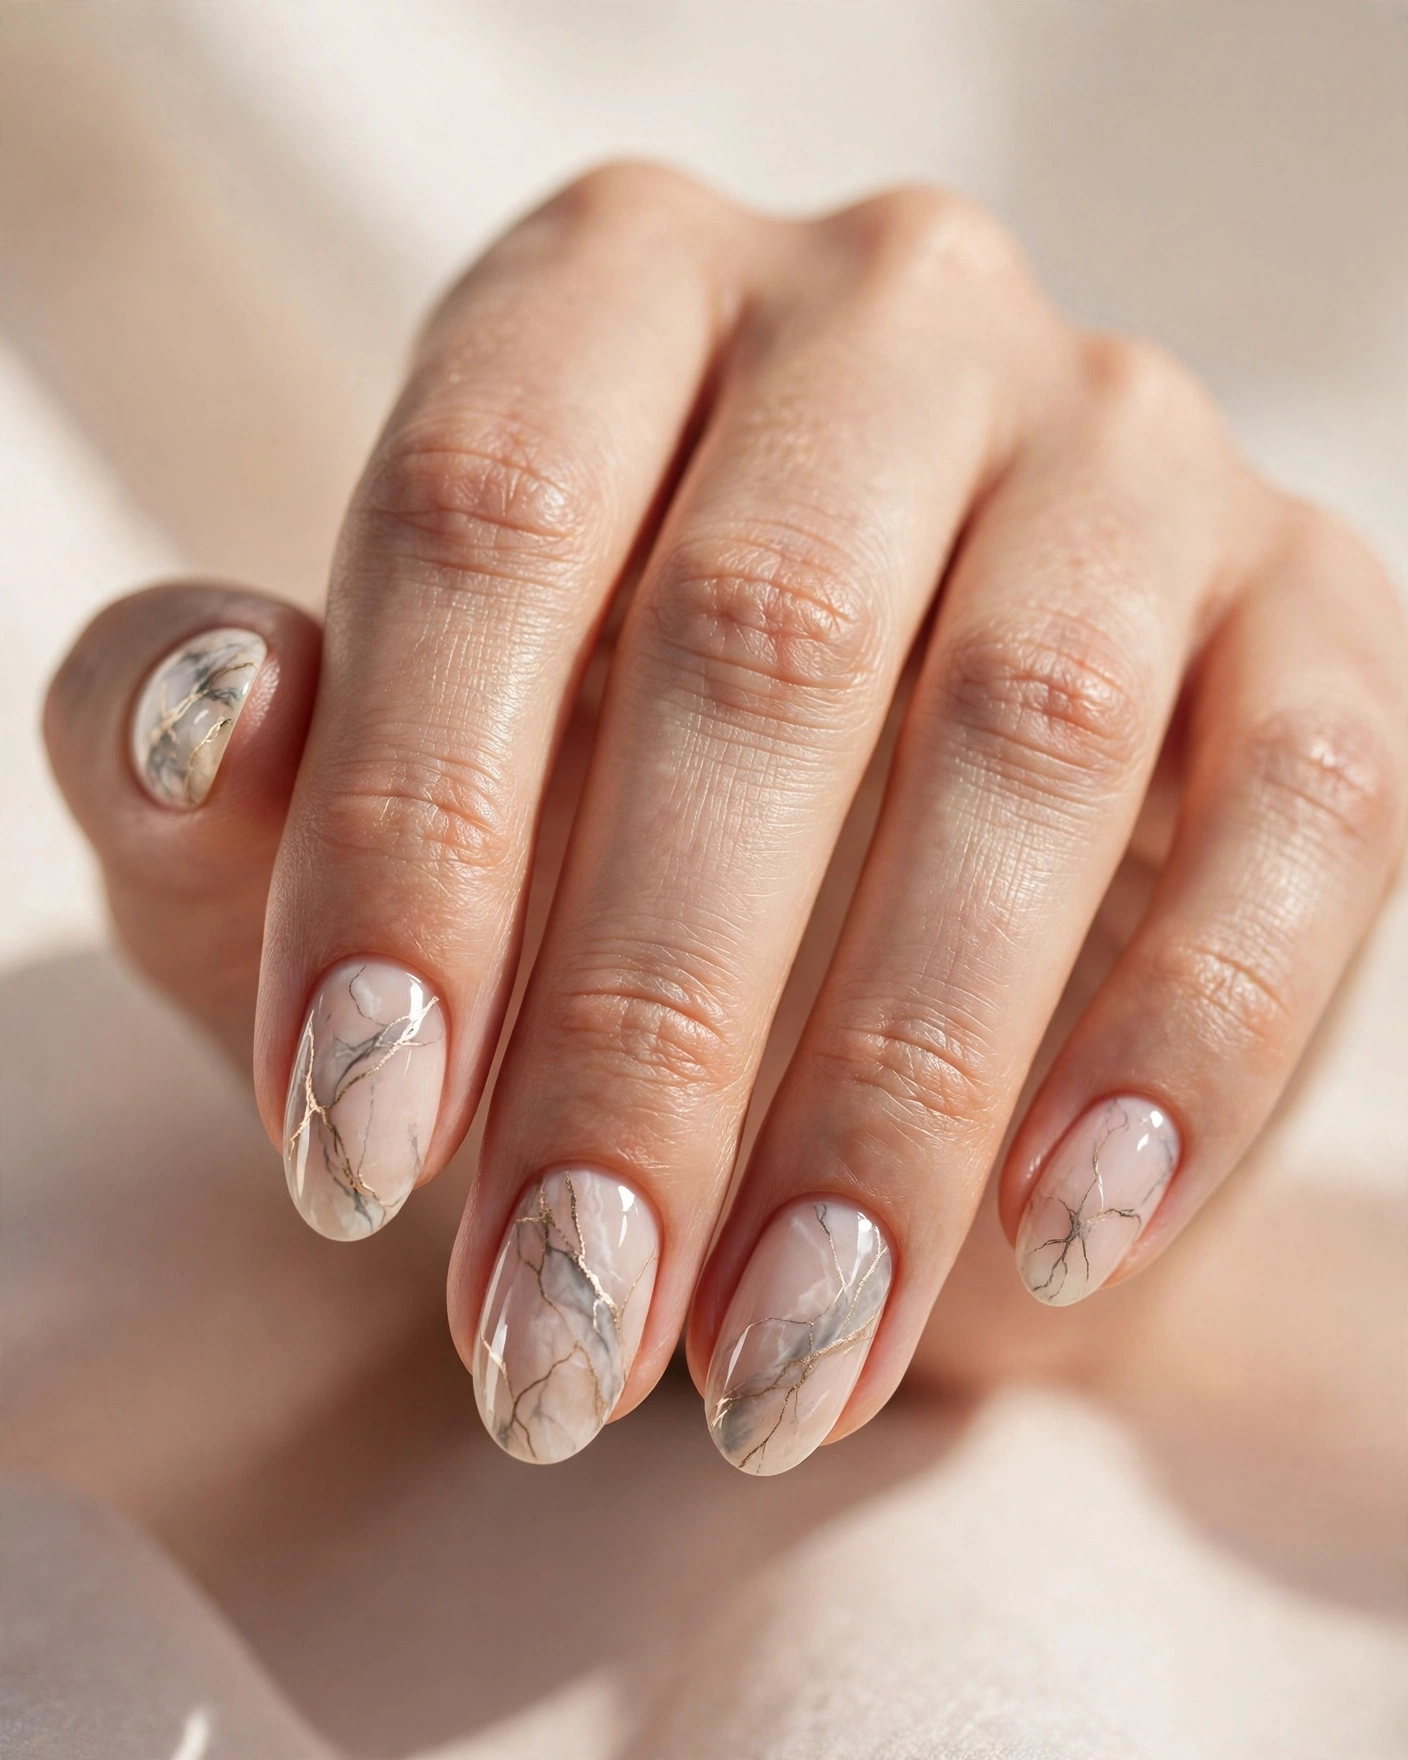
The look: fine grey and gold veins trailing across bare nails like marble, or like frost on a window. Organic, quiet, and completely different on every nail.
Shape and length: medium oval.
Colors and finish: soft grey with champagne-gold accents on bare nail, glossy.
Difficulty: medium — veining is done with a fine brush dragged through still-wet polish; the technique is simple but wants a light touch.
Why choose it: marble is the design that never looks dated, and on a bare base it stays light instead of heavy. The gold veining catches winter light beautifully. It’s also the most forgiving “impressive” design here — veins are supposed to look random, so there’s no wrong answer.
How do you make negative space nails last?
Negative space nails last longest when you prep the bare nail properly, seal every edge of polish, and refresh the top coat every few days. Push back cuticles and remove surface oils before you start — polish adheres to the bare sections only as well as the nail is prepped. Cap the free edge with each coat, apply top coat over the bare sections too (it protects the natural nail and unifies the finish), and add a fresh layer of top coat around day four. Cuticle oil daily keeps the bare areas from looking dry, which is what gives away a tired negative-space manicure.
A few more practical notes. Gel versions of these designs wear two to three weeks because the product bonds to the whole nail; regular polish versions last five to seven days with top-coat maintenance. The bare base is genuinely the longevity trick: unlike a full-color manicure, there’s no obvious regrowth line at the cuticle, so the design still looks intentional when it starts to grow out. Keep nails at a consistent length with a weekly file, and avoid using your nails as tools — the thin line work in designs 2, 6, 14 and 15 chips first at the edges, and a quick top-coat refresh is the fix.
Frequently asked questions about negative space nails
Are negative space nails easy to do at home?
Yes — most negative space designs are easier than full-coverage art because the bare nail hides small mistakes. Dots, stripes with tape, and half-moons with sticker guides need no special skill. Start with designs that use tape or stickers (diagonal blocks, chevrons, half-moons), and leave freehand work like marble veins until you’ve done a few.
Do negative space nails last as long as regular manicures?
They often look good longer. Because the base is bare, regrowth at the cuticle doesn’t create an obvious line the way it does with full polish, so the manicure stays presentable for an extra week. Actual chip resistance depends on prep and product: with proper base prep and top coat, expect five to seven days in regular polish and two to three weeks in gel.
What colors work best for negative space nail designs in winter?
Deep, saturated shades contrast best against bare nail: espresso, burgundy, emerald, navy and terracotta are the winter staples. For line work, champagne gold and white read cleanly at small scale. Avoid very sheer or pale colors for the main design — without contrast against the bare nail, the negative space effect disappears.
Can you do negative space nails on short nails?
Absolutely. Dots, hearts, micro-French tips, checkerboard and snowflakes all work beautifully on short nails — small motifs suit a small canvas. Choose designs with compact geometry rather than long lines: the dot constellations and bare-center hearts above were designed for short rounds. Avoid long gradients or mosaics, which need length to read properly.
Which nail shape is best for negative space designs?
Almond, oval and squoval flatter negative space most because their curved edges create interesting geometry against the bare sections. Short round nails suit dots, hearts and micro-French designs. Long coffin nails carry large patterns like diamond mosaics. If you’re choosing one shape for the whole season, almond is the most versatile for this style.
How do you keep negative space nail designs from chipping?
Prep is everything: remove oils from the nail plate before painting, cap the free edge with every coat, and seal the bare sections under top coat too. Refresh the top coat every three to four days, moisturize cuticles daily so the bare nail doesn’t look dry, and avoid using nails as tools. Thin metallic line work chips first, so give those designs an extra top-coat layer.